
 |
| The Imperial Car Destroyer's Great Great Grandmother |
Also, there was the aspect of the rust. For a vehicle this old, that I am certain was not garaged inside all of its life, there is actually a lot less of the flakey orange demon as could be expected, but there is still plenty if you look closely. They are most notable along the seems of the van body (or koffer, as I like to say) and any place where different pieces of metal meet and are joined together. Around any of the 6.5 million rivets holding the thing together is a classic example of where to find some rust. I really want to tackle this problem, and one way to do it is to track down every place I can find, sand it, put some Locktite Extend or POR-15 on it, and then cover it in rust resistant automotive primer.
Which is of course exactly what I did. This will lead to a patchwork, motley look to your vehicle, but hey, you have dealt with some of the rust, right? So all of this is a good excuse to get it painted. Although in my case, I was always going to paint the truck, so it motivated the hunt for the rust instead of the other way around.
 |
| Pressure Washer in the 3000 PSI Range |
I began blasting the years of accumulated grime off the truck, as well as many flecks of paint as the top layers began peeling where they had already been cracked and dry. This was good, as I wanted all of the loose stuff to come off now, instead of after it got painted. I didn't have the resources or time to take the entire vehicle down to the frame and prime it, so I intended to just knock off the most damaged bits of old paint, give her a light sanding, and call it good. Oh, and deal with the rust, of course. The pressure washer worked great at this. Years of dust was knocked loose, soon to be running down the driveway and headed to the ocean. Not a bad voyage for dust from Nevada if you ask me.
 |
| "Just like a flame thrower, only different..." |
 |
| Yucky roof hole! |
I also found two previous metal patches on the roof, big square sheets of metal that had rusted entirely since being installed. This got me to thinking - I should do something about my holes as well. After reading some other posts and M109A3 build threads, I decided I wanted to cover the roof in truck bed liner, that rubberized, heavy duty, good grip black stuff you, uh, often see in truck beds. This would be nice and everything resistant, give you good footing when you were on the roof, and seal the sucker pretty damn well. With this in mind, I simply coated the hole in Loctite Extend, let it dry, and primered it with some rust resistant primer. I had in mind that I would simply coat it in Herculiner (the truck bed liner I mentioned) and be done with it.
But the more I thought about it, the more that solution seemed kind of half assed to me. I voiced my thoughts on the matter to Joe, and he suggested I do a hull patch. I asked him, "How so, sifu?" He explained the process to me, and it sounded really straight forward. I then went on to YouTube and watched a couple videos of backyard mechanics doing cheap autobody repair with cheap sheet metal and rivet guns. Hell, I can do this!
So the next morning I went to Home Despot before heading in to work, and bought myself two tubes of all weather adhesive sealant caulk, a large piece of sheet metal, some metal shears, the nicest rivet gun I could find (well, one below the most expensive really, hehe), and an assortment of pop rivets. That evening when I got home from work I piled the supplies on my work table and decided to have a crack at it. How hard could it be? Ends up, it's pretty darn simple.
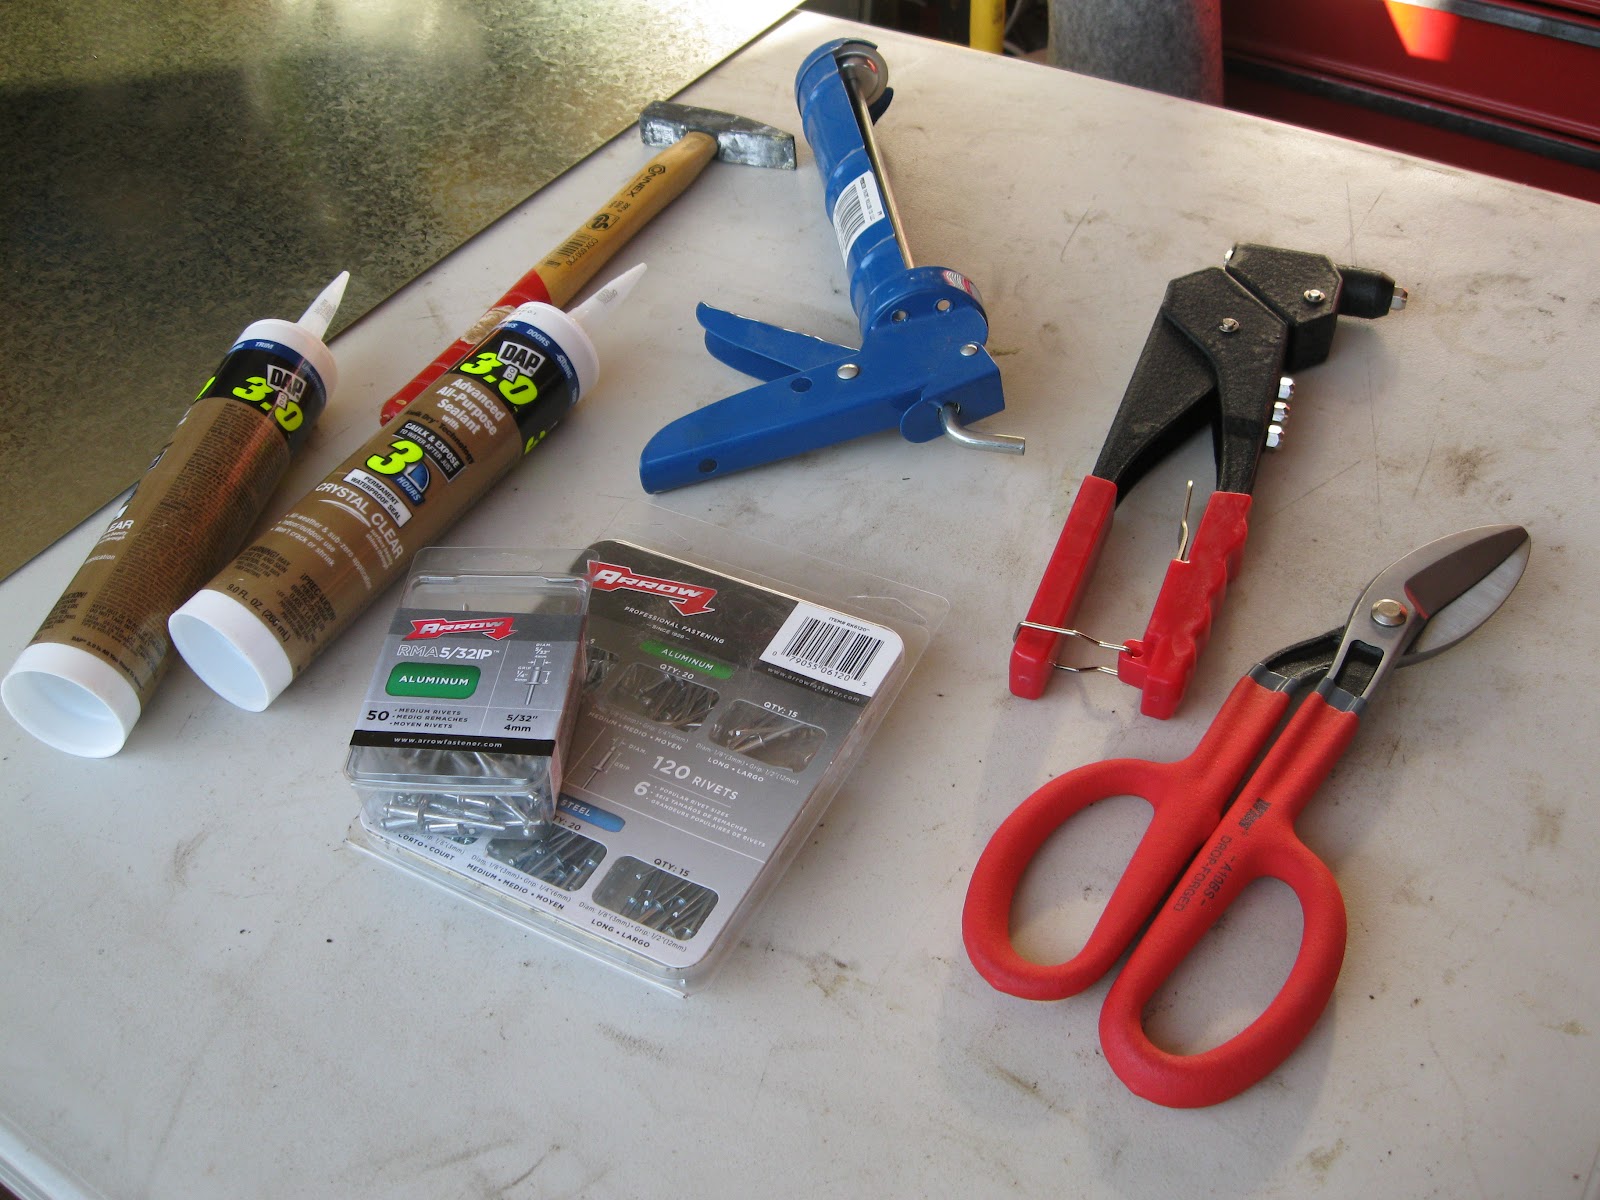 |
| Everything you need to do a simple hull patch |
 It being summer and all, it stays light out pretty late. So I climbed up on top of the koffer and got to work. I measured how long a piece of sheet metal I would need, and I decided to keep it wide enough to cover either side of the seem of metal where the two original sheets come together and have rusted out. Taking these measurements down to my work bench, I then drew on the sheet metal in Sharpie the lines I was to follow. I then grabbed the nice angled cutting sheers I had bought. A word of advice here from having used the cheaper, lightweight ones. Buy a nice big, drop forged angled pair. Sure they cost ten bucks more, but they work! These babies will cut through just about anything, and the sheet metal (what they were designed for after all) was no exception.
 Taking my new metal patch, I then dragged the rest of my gear up on top of the koffer and sized it up. Looks like I had about the right size. So far so good. Next step was to coat the hole and the area surrounding it in adhesive sealant. This is where I ran into my first bit of trouble. It seems that my old, cheap caulk gun (the same one I used to do the floors in van body) had randomly crapped out on me. When I pulled the trigger, it did not advance the plunger and cause wonderful sealant goop to come out. No, instead it did nothing. Nothing. No problemo I thought, I am a handy guy, I'll figure out whats wrong with it. Well, let's just say that it didn't go so well, and I ended up throwing it across the yard in disgust after having hammered the shit out of it when I lost it in a fit of impotent rage. Hey, it deserved it, I swear! So, quick trip to the hardware store down the road, replacement caulk gun shoved into the motorcycle jacket and return trip, and I was back in business. THIS one knew not to mess with me (I showed it the mangled ruin of the last gun that defied me) and I soon had the area covered in goopy sealant goodness.
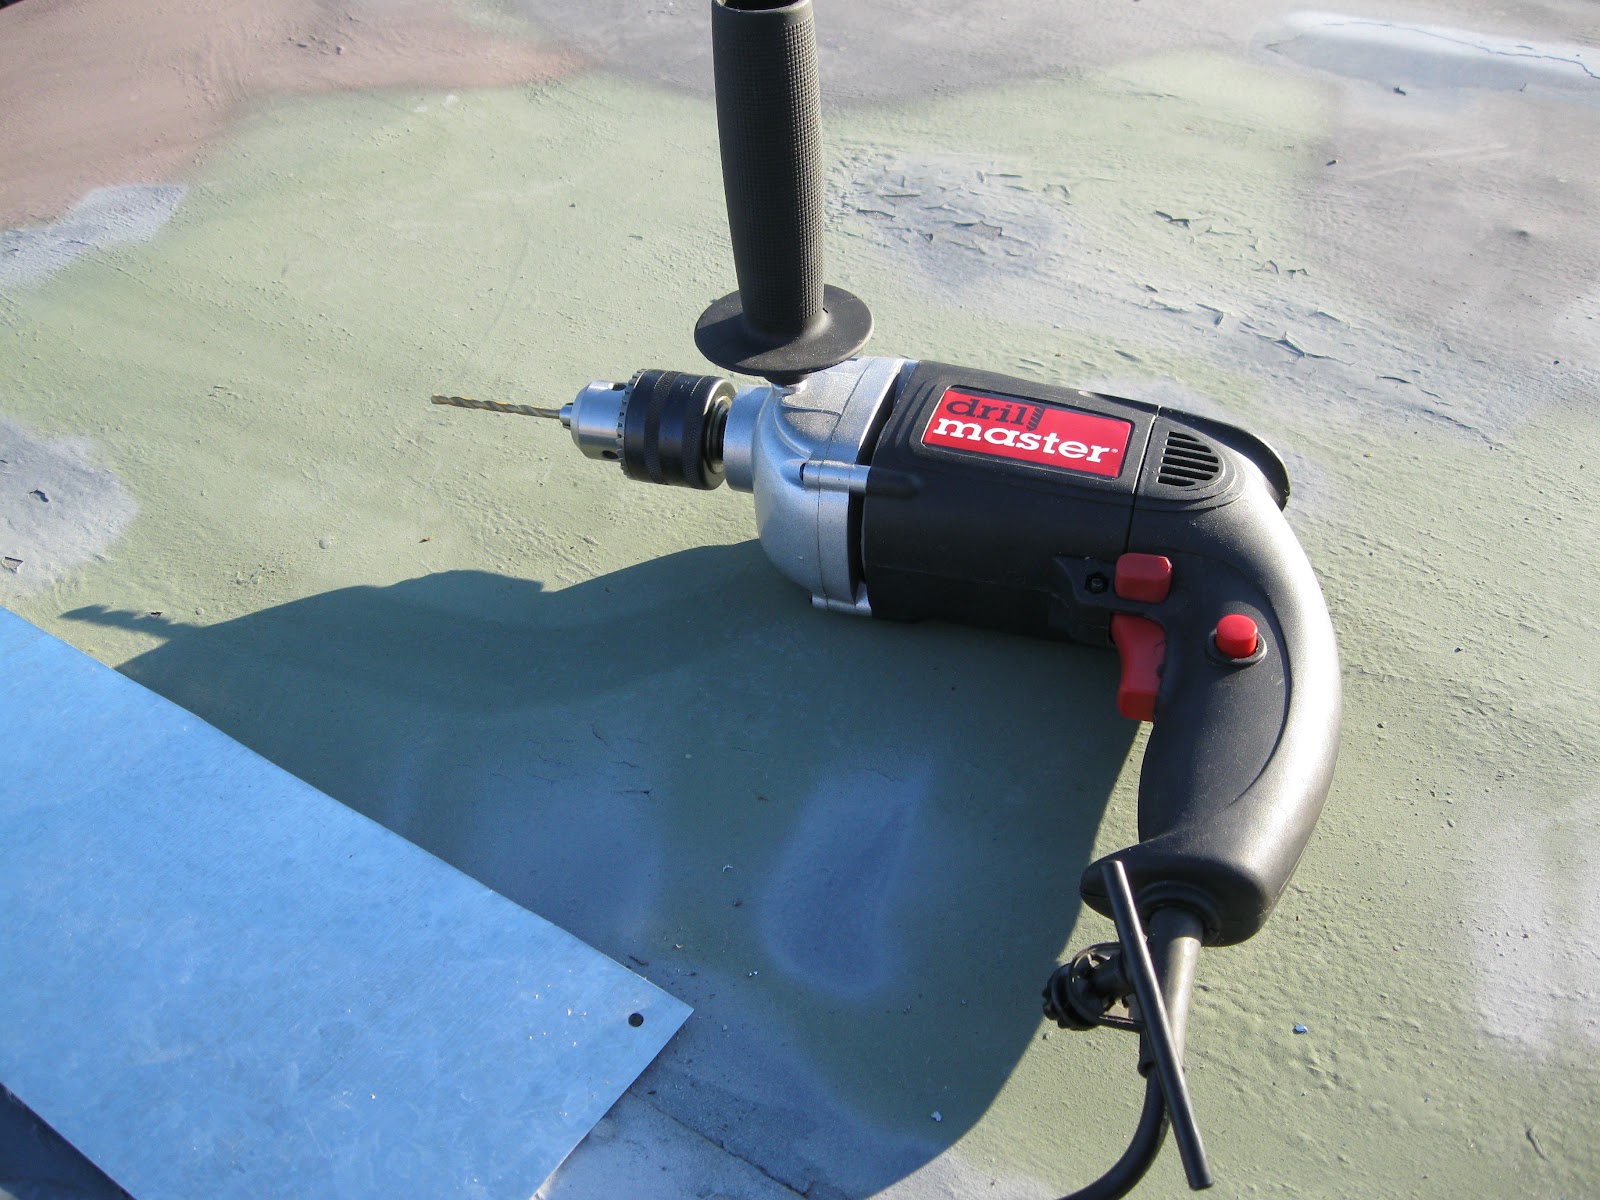 Next step is to lay the cut piece of sheet metal over the top of your freshly gooped hole and press it into place. The adhesive caulk should do a pretty good job of keeping it there. Now to drill your first couple of holes to put rivets in. I grabbed a likely rivet from my new set and sized it up against the cheap Harbor Freight 115 Drill Bit set I had bought a few months ago. I found a drill bit about the right size, grabbed my cordless drill, and climbed back up on the roof. It ends up the old Makita couldn't quite hack it. Sheet metal no problem, but the steel of the roof just laughed at the little cordless. Time for me to grab another Harbor Freight special, a big beefy incredibly cheap corded drill with plenty of power. It also had the annoying tendency to not always drill when I pulled he trigger when in its forward setting, and would need to be jostled a bit to work. *sigh* Well, I did mention it was quite cheap, right?
 |
| First hull patch in place. Now time for more rivets! |

 I chose what simply felt like a good spacing, and started drilling more holes. I highly recommend using some kind of punch to set where you want to drill ahead of time, as it keeps things consistent, and it makes drilling a lot easier. That being said, I did run into my second real problem here. Ends up, old American steel is superior to cheap Chinese drill bits. Just after putting a hole through the steel top, I broke my first drill bit. Yes, I said first. There would be more. This was going through the section of roof that had two of the overlapping sheets of metal - along the skinny edge of the hull patch. I broke one more on that first patch before I got the hang of it. In all I would go through something like four drill bits that evening. Now my 115 piece set is only a 111 piece set, and missing all of the useful little sizes. Aw well.
 |
| First patch done, and looking great! |

 At this point I had gotten the hang of things, and moved through patching the next three holes in rapid succession. By the time I was finished it was getting dark, and I had broken two more drill bits (putting me to the number four, like I mentioned). I finished up by sweeping up all of the discarded rivet tails, cleaning up the tools, and grabbing some rust resistant black primer. I know you aren't supposed to paint at night, out of doors, but the alternative of leaving bare sheet metal to the tender mercies of the coastal mist didn't seem too appealing either, so I simply went for it. A lot of owning this truck was knowing when to simply go for it after all. Went on just fine, and even if it didn't, I was going to be coating all of this stuff in Herculite anyways, so fuck it. I stood back and took a look. Looked pretty good! Semi pro anyway, or if not that, at least as good as the two original military patches already up there.
My daughters joined me on the roof at this point, and I showed them my handiwork. They all played along and pretended to be very impressed 'Dads Truck Stuff'. We celebrated by an impromptu dance party on the roof.
Another Civic drove by. Mouth agape. "What. The...."
 |
| Indigo, Imperial Dance Agent! |
 |
| Ember, rocking roof dance! |
Cracks in the pan should be detected before the insertion of the new pan.
ReplyDeleteSubstituição de Vidro Automovel