Tuesday, May 1, 2012

Treasure Hunting and the Curse of the Mini

Greetings and Salutations Hominids!

Well, it has been a while since posting, but your humble Captain of the Imperial Car Destroyer has traveled far and wide in recent months.  Work sent me off to Singapore, hot and humid land of Lesser Vehicles (no really, they typically range from under 1 liter to just under 2!  They are so tiny!)  and thus work was temporarily suspended due to a lack of physical co-location.  In other words, I was out of town, bummer.

You Gonna Get It Lock!
This post covers the grand revealing of my side cargo compartment on the Car Destroyer, which came locked the day it arrived in front of my house.  It had a classic hardened steel lock hanging off the side, the vehicle came with no keys what so ever.  Not even an ignition key! (doesn't need one, hehe)  Well, naturally I was curious what exactly would be inside this mysterious 50 gallon capacity box wedged under the driver side cab. I say 50 gallon capacity, because the storage box bears a striking resemblance to the gas tank on the other side of the vehicle in size and general shape.


Never one to let  little things like steel locks stop me, I busted out with my hand dandy cut-off tool and clamped the offending lock in place.  You could practically see it quivering in fear.  Safety goggles and gloves on (Safety first children!) I got to work.  Sparks flew, neighbors winced, and soon the deed was done.  I felt quite satisfied as the loco dropped to the ground, quite thoroughly defeated.

The Vault Is Opened!
This is where we go into our Quiet Mysterious Announcer Voice and say something like "And now we prepare to open the Vault of the Unknown, never before unearthed on camera or film before...".  I forced the sticky lever open and opened the storage box.  I was greeted with a puff of stale air and a fine cloud of authentic Nevada Air Field dust.  I could see the dim shape of a red box lurking atop a random assortment of other goodies.  I was quietly thrilled, because I was just as prepared to be faced with an empty, rust covered box.

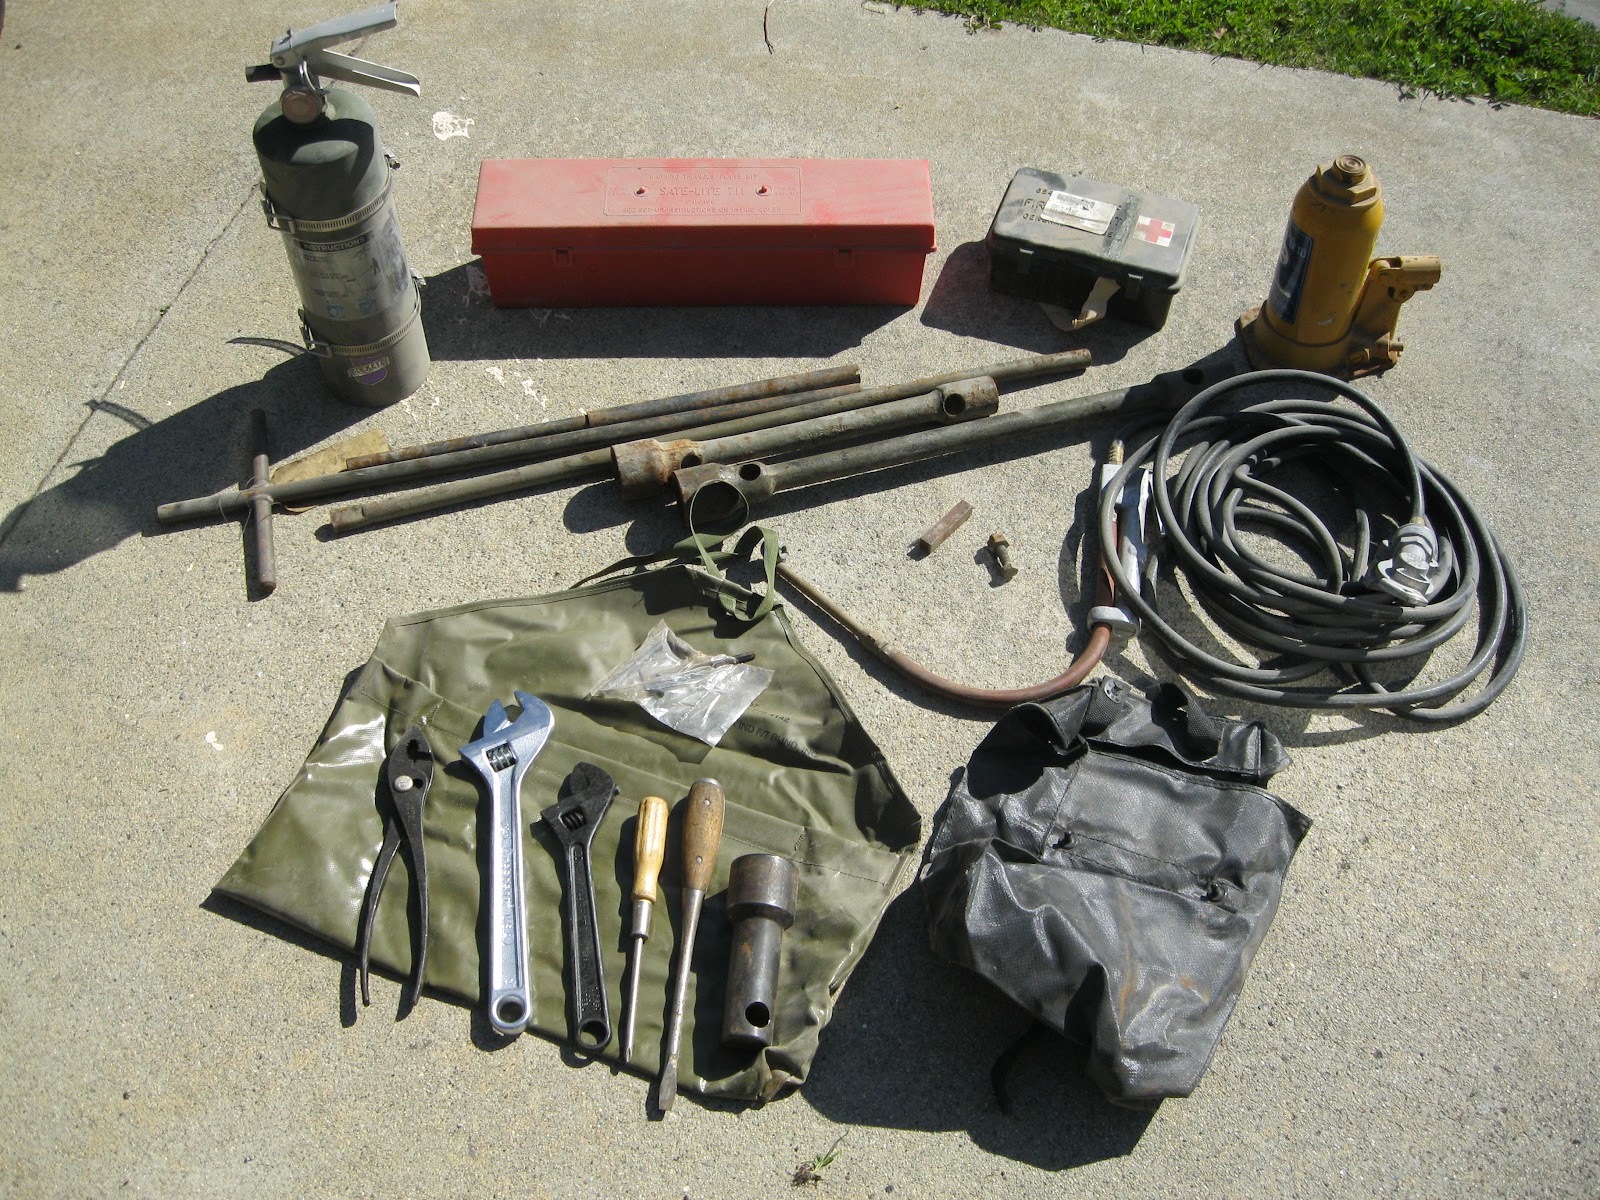
I pulled out the contents and spread them out on my driveway for inspection.  There was a lot more loot there than I initially thought would be the case!  The red case ended up being for for a collapsible roadside warning triangle (not a left over recoiless rifle, like I had been hoping, drat!).  In addition it had a small collection of tools, a spare fire extinguisher, a glad hand air attachment, a small first aid kit, a small bottle jack, and some various heavy steel bars for changing tires.  All in all, quite the find!

Show Me The Booty!
After pulling everything out I duly went through and knocked the rust and dust off of most of it.  The bottom of the bottle jack was pretty rusty, so I cleaned that up and hit it with some rust resistant spray paint for good measure.  I then added my 50' Land Line power cord to the collection and put everything back in the box for now.  I will need to eventually add a more complete tool set to the Travelling Kit, but I would have time to do this before going on my first serious long trip.

I went ahead and took the fire extinguisher (it was still good) and mounted it on the inside of the cab.  I had to buy some longer bolts from the hardware store in order to get the mounting bracket in place over the insulating foam I had installed, but it turned out pretty good.  Now the cab is protected in the event of a pyrotechnical emergency!

That accomplished, I then turned my attentions towards getting my ladder mounted on the rear of the vehicle like it ought to be.  It has been bouncing around in the rear of van body for too long now, and dragging it in and out has been scratching my beautiful new linoleum floor, so that just wouldn't do.  There is a mounting bracket on the rear door of the van body, on the outside obviously, but it was positioned out of place.  When I hung the ladder on it it sat at a weird crooked angle.  Obviously this would not do!  I spent some time moving the bracket around until I got it into an acceptable position, and then secured it in place.  The ladder now hung beautifully on the back!  I still don't know how to use the weird military latches on the bottom that look like they should secure the bottom in place, but I am confident I can figure that out.  I pretty much have to before I go bouncing down the road, hehe...

Last but not least, I decided it was high time to secure the vehicle.  Even though I live on a quiet little side street in Santa Cruz, crime seems to be getting worse and worse.  I had my motorcycle stolen from this very same driveway a year or two ago, and my subwoofer and amp stolen out of the back of my Mini Cooper, so I speak from (painful) experience on this subject.  After going back and forth on how I might get locks into the doors of the Car Destroyer, my wonderful wife Cricket pointed out I was overthinking it.  This is something I have rarely been accused of, so I decided to listen carefully.  She suggested that I simply buy some Bad Ass pad locks and bolt them to the door.  I instantly loved the idea, and set out to put it into motion.

Door locks, the Subtle Way!
I was a little conflicted as to where exactly to put them, but I settled on near the door handle.  This is still pretty high up on the vehicle when standing next to it, but easy enough to reach.  It is also more towards the middle of the door, so it will provide a better locking point than at the top or bottom.  I initially used screws that were too long, so I couldn't roll down my windows!  I quickly corrected this issue by a quick trip to the hardware store for Yet More Stainless Steel Bolts.  I then hung a pair of Master Locks off of each, and POOF! - door locks.

I was waiting the entire day to meet with some folks interested in buying my Mini Cooper, which I desperately need to sell in order to fund the Imperial Car Destroyer.  I had been in email and phone communication with this couple from Arcata for over a week and a half, and they were hot to buy the car.  I told them all about it, and they were quite interested.  They arranged to visit some family in the area (a sister lives in Aptos or some such).  I got a call when they were in Redwood City, and they said they would be there within the hour.  Said hour came and went, and they did not appear.  I started to worry a little, but I told myself I was being silly.  Then a I got the following text:

Oh.  My.  Fracking.  God.  Really?

Yeah, that's right.  Less than ten minutes from my house, they literally get hit by a car and totaled.  This is the "Hit By A Bus" scenario everyone talks about.  Obviously they couldn't make it, and buying the car was off. I had bought a bottle of champagne that I was going to open when the car sold.  It is still in my fridge as of this post.  I feel horrible for this poor couple, who sounded like really neat people.  I also felt horrible for myself, as I really needed to sell the car in order to move forward with the project.  Cricket has suggested that the YarMini is a little like Christine, and is killing off potential buyers, but I sure hope not.  Oh well, maybe I will get to taste that sweet, sweet champagne in the near future...

Next post I will be getting into the largest automotive task I have ever done, replacing the front axle seals!  For this task I shall tear off the front wheels, remove the brakes, the axle, and more!  Stay tuned for this next exciting episode.  Will our hero live, die, get trapped under the 7.5 ton truck?  Read on to find out!


Thursday, March 8, 2012

From Thunder to Rumble...

Greetings all!  Sorry it has taken me a bit to get this last post updated, life is like that sometimes.  Okay, without further ado - let's begin!

As you may have noticed, I have been on a mission to do something about the sound levels inside the cabin when driving around in the Car Destroyer.  In short, they were very, very loud originally.  So loud Cricket had to spend most of her first drive covering her ears.  The original military warning sticker - in Bright-The-Pluck-Yellow - wasn't kidding when it said "Danger - High Intensity Noise.  Hearing Protection Required".  I had already gone through and added a layer of DynaMat to the floors, walls and ceiling and installed some acoustic foam, now it was time for the coup de gras, a new muffler.

Shoulder Launched Mark 1 Muffler
I had originally specced out some mufflers for semis and whatnot, and discovered that the generic inlet and outlet diameter for a semi exhaust system is 5".  When I measured the diameter of the exhaust pipe on the Car Destroyer, I found it to be "only" 3.5", so none of the ones I had picked out would work.  Scratching my head, I decided I had been going about this all wrong.  What I should have done (and then set out and did) was to first look on Steel Soldiers and see if anyone in the MV community had already solved this particular problem.  As it turns out, of course they had, and instead of a couple to several hundred dollar semi exhaust, I was able to find exactly the right muffler on Amazon for under $60.  And since I have Amazon Prime, it will show up at my doorstep in two days with free shipping, which for something like a four foot long exhaust is just ridiculous.  I purchased my new Walker Exhaust Heavy Duty Muffler early in the week, and it showed up in time for me to use it on the weekend.

Next I had to figure out exactly where and how to install it.  The exhaust on the ICD (Imperial Car Destroyer) exits the passenger side of the engine compartment and runs up vertically alongside the front corner of the passenger side door.  It has a little snake through the passenger side wheel well first, then heads straight up.  It is secured in place by a large metal brace that extends out from the cab body itself, and is further protected by the superstructure of the mirror housing.  I decided to mount the muffler such that it would be contained within the mirror superstructure, slipping on to the old exhaust pipe just above where it exits the wheel well.  I started out by spraying all of the various nuts and bolts that held the old exhaust in place with WD40, and then began taking them apart.

First to come off was the old heat shielding, held on by a few alternately rusted or missing bolts and a few layers of paint.  Pulling it free, you really get the picture that the original exhaust on the Deuce is just a long straight through pipe.  Stealthy these vehicles were not (despite their camo paint jobs).  Next I noticed that the top part of the exhaust is actually a separate piece of pipe, held together with an ingenious rounded pipe clamp that locked the two beveled edges of the two respective pipes together.  Undoing the clamp, it was a simple matter of lifting off the top part of the old exhaust and setting it aside.  The insides of the pipes were coal black, covered in soot from a lifetime of service.  Once I had all of the various removable parts of the old exhaust off, I was left with about three feet of remaining exhaust.  I only needed about 6" or so (baby) to mount the new muffler, so I made some measurements and marked where I would need to cut.

A while back I had bought a 3" air powered cut-off tool from Harbor Freight, and it was hight time to try it out.  Donning my protective gear and firing up the 'ol air compressor, I got to work.  Sparks flew across the driveway and showered off the hood of the truck as I cut a ragged line across the pipe, eventually removing it.  I wouldn't win any prizes for my beautiful straight line, but it would work.  As the new muffler would be slipping on over the old exhaust, I figured I could get away without it being a flawless straight line.  Resisting the temptation to fire the beast up and let it rumble across the entire greater Santa Cruz area, I proceeded to see if the new muffler would fit.  I had slapped a coat of primer on the outside of the muffler by this point as well, as seeing all of that bare metal made me cringe after having dealt with so much rust on the truck so far.  The new muffler slid into place snugly like it was designed for it (which, I suppose, it had been, being built for all 3.5" exhausts, duh) and I was mighty pleased.  I was a little worried that the larger diameter of the muffler would not fit in between the support bars of the mirror, but it just made it.

A nice, snug fit for the Car Destroyer's new muffler...
At this point I just had to add a top.  I went to the top section of the old exhaust I had removed and made some measurements for how much of it I would need.  I then made some marks, and bolted it to my work table using some C-clamps.  Redonning my protective gear, I once more let the sparks fly and used the cutoff tool to remove the top foot or so.  What I was really after was the nice curved 90 degree bend at the top, as well as enough height that the exhaust would clear the roof of the cab.  After a little bit of effort, I had the piece free.  I was able to slip it into the top of the new muffler without and difficulties, and it was looking pretty good!  I used some simple stainless steel hose clamps to hold them together for now, but I have plans to make the connection more robust in the near future.  I also ran some steel strapping from the remaining mounting bar around the muffler and pulled it tightly into place.  It is nowhere near as good as the original mount, but it would do for around town driving until I could fabricate something better.

Imperial Car Destroyer Muffler, Now with 100% More Top!

At this point I couldn't wait any longer.  I went ahead and fired the beast up and let her idle.  I went and grabbed the wife and sat inside the cab, closing the doors.  The sound was much, much quieter than before.  Well, quieter is not really the right term to use.  How about less loud, but still very much on the loudness spectrum.  That being said, I think I will really, really appreciate the dampened sound on long road trips to Death Valley and beyond.  Cricket didn't have to cover her ears in pain even once!  Calling it success, I packed it in for the day.  Tomorrow would promise to be an assortment of odds and ends, which I will cover in my next post (which I hope to get out to you guys much quicker than this one).

Monday, February 27, 2012

You Painted What?

Well, heady from our first successful mission in the Imperial Car Destroyer, it was time to make some real progress on the vehicle once more.  I had spent my last several sessions getting the cabin ready for some real transformative magic to take place, and the time was ripe.  I had shed blood, sweat and tears getting the Foam from Hell off the walls, I had already removed the data plates, and I had installed a Super Pack of DynaMat to the various exposed body plates.  The time was ripe for some good ól fashioned Beautification.

So I jumped right into it and instantly started... doing some more prep work.  Apparently if you are going to paint anything at all, you need to spend about 90% of your time on the prep, and the actual painting is kind of an after thought, tacked on at the end.  I knew this going into this project, it just always surprises me how much time it takes.  There was nothing else to it though, so I pulled out some junk mail (those damn annoying special deal on food from your local Big Name Grocery Store mini news papers) and put them to good use - masking off my windows.  I then went through and added masking tape over all of the instruments gauges as well, and over other things like the air horn button in the center of the steering wheel, and of course my air filter indicator at the bottom of the steering column.

Low Tech Black Out Ads
Leaky Front Axle Boot on the Passenger Side
It was sometime during this process that I crawled under vehicle for some reason.  It was then that I noticed I was leaking yucky Green Gobs of Goo (the deadly 3Gs) from my front passenger wheel.  There is a rubber boot that protects the steering knuckle just on the inside of the wheels, and it looks like mine had sprung a leak.  Not too surprising really, since this truck had most likely sat on some lonely airfield for the last decade or so waiting for something, anything to happen.  The tiny bit of driving around it has gotten to do with Captain Yarrow behind the wheel was probably more than it has seen in years.  Anyways, I noted this, and moved on, as it wasn't my project for that day.  For those of you that are interested, I looked this up on Steel Soldiers later, and cross referenced it with the TMs, and it looks like my Front Axle Boot is toast, and will need replacing.  They come in two varieties, one which is a zippered boot, that does not require you to remove the entire wheel, and a more durable fully enclosed boot, that does require the entire wheel to come off in order to be installed.  Both options have their advantages (and disadvantages), one is quick(er) and easier to do, the other gives me a chance to rebuild my front suspension, check out my front brakes, replace some bearing seals, and deal with any other lurking problems I may have down there.  It is also a MUCH bigger job.  However, that is a problem for some future day, so I just snapped a few pictures, and moved on.

So, I fired up my air compressor once more, let it fill the tank to 120 PSI, and adjusted the regulator to 40 PSI, which is appropriate for my HVLP spray gun, and started mixing the paint.  As I had bought two gallons of the Silver Mist grey for the interior of the van body, and barely used 2/3rds of one gallon, I figured I should go ahead and use that.  My basic plan is to have the interior be one basic color for the under coat, and the exterior one other basic color.  I went with light grey on the inside, and a darker grey on the outside (picked out, but not purchased yet).  So, loading up the paint gun, I got to work.  Something should be mentioned about paint guns.  They have a few major adjustments, one for spray pattern, and one for air flow.  Screwing with both of these knobs will get you the eventual pattern and flow you want, but neither is as important as this one thing.  Scrape off the end of your spray gun where the paint actually exits.  This may sound trivial, or obvious, but trust me, it's easy to forget.  And if there's even a little bit of dried on paint clogging something, it can seriously slow you down and make your paint gun seem pretty anemic.  Take it from a guy that found out the hard way.  Check that shit.

It had gotten dark by that point, so I decided to pack it in for the day, because painting in the dark is not very productive (read - stupid) and it was time to spend some time with my family.  I washed out the paint gun, put away my tools, and closed the doors to the cab to let it dry over night.  I would have loved to have had a beautiful, fully enclosed work area for the truck, but short of a full vehicle bay, my front drive way would just have to do.  Anyways, how else was I supposed to meet all of the neighbors and continue my Imperial Outreach program?  Luckily for me, this so called "Winter" has been more of a summer, and it not only didn't rain, but it was mostly clear with very little moisture in the air.  When I checked on stuff in the morning, it looked just fine.  Sure, I had missed a bunch of spots (painting in the dusk, tsk tsk tsk) but it looked essentially okay.

Cabin Interior the next day.  Yes, I painted the steering wheel...

Loading paint back up in the spray gun, making sure my nozzles were all cleared and clean this time, I proceeded to add a second coat over my efforts from yesterday.  This time things went fairly quickly.  It was a beautiful sunny day, and even though it was a little windy, it didn't seem to effect things too greatly.  I made fast progress, paying special attention to areas I had previously put too thin a coat on, or had simply missed.  I also covered the canvas seats with trash bags and did my best to paint the chairs support members as well.  I missed a few spots, but mostly got it.  Professional paint job this was not, but it looked a hell of a lot better than it had been.  Now, before I go into detail about some of the things I perhaps did a little wrong in my over zealousness to fix up the cabin, let me remind you that it was my overall goal to cover up and transform the rusty, dusty, grime filled interior into something else entirely, and if I may have or may not have gotten a little carried away with the glorious power of a paint gun, who can really blame me?  Right?  Right?

Wife:  "You painted the seat belt."
Me:  "Uh, yeah.  I guess I did..."
So, I coated everything in paint.  Nice, grey paint.  I painted the steering wheel.  Not the best idea, as it would most likely rub off in a day or two, but it was otherwise going to be a dark green, and not go with anything.  And more likely than not, I was going to get whiffs of paint on it anyways, so why the hell not.  My long term plan is to paint it black, or wrap it in something blackish.  And then there were the ancient-in-dire-need-of-replacing canvas booties that cover the bottom of the shift level and the high/low transfer shifter.  Both were cracked in a dozen places and impregnated in dust, and needed to be replaced.  Knowing I was going to replace them, why not have them be coated in a loving canvas of attractive grey paint until then?  Sure, the paint will crack some with use, but I was going to be replacing them any day now, so what did it matter?  In my attempt to paint over the DynaMat, I can tell you don't.  Not without priming.  The nice silvery reflective background needs primer to take a layer of paint, otherwise it scratches at everything.  This layer was just going to get some floor covering and a vinyl mat over it anyways, but hey - paint gun.  And last, but not least, I managed to get the one of my seat belts as well.  This is, of course, the very first thing my beloved wife noticed when I proudly dragged her out of the house for one of our "Hey honey, what do you think?" sessions.  Within seconds she pointed to the seat belt and started laughing.  I laughed too, because hell, what else could I do.  She didn't know how lucky she was that I still didn't have my paint gun in my hands.  grin


So, with most everything I wanted (and a few extras thrown in) painted grey, I started doing the most enjoyable part of painting, ripping all of the masking tape and paper off.  Off came the tape covering the gauges, off came the protective ads on the windows, off came the trash bags covering the seats!  When it was left, it was looking pretty damn good, if not a little bit too grey in areas.  Seemed much lighter in the cabin than in the van body, even though it was the same paint.  I then started with Phase Two of the cabin face lift project - adding some sound insulating foam!

I had spent a ton of time removing a lot of the old foam from the walls and ceiling of the cabin, so now it was time to replace them with some nice acoustic deadening foam.  The roof of a Deuce and a Half is typically a canvas affair, easily replaceable and capable of being taken on and off in a hurry.  Luckily for me, mine had the hard top replacement done to it previous in its existence, and sported a nice weather proof metal skin.  The hard top roof is held up by a series of braces on the inside, and there is about a 1" gap between these and the roof of the vehicle proper.  These made great places to shove the ends of the newly cut acoustic foam to hold them in place.  It also looked really good.  So, I set about measuring the spaces that needed foam, then cutting appropriately sized pieces and stuffing them into place.

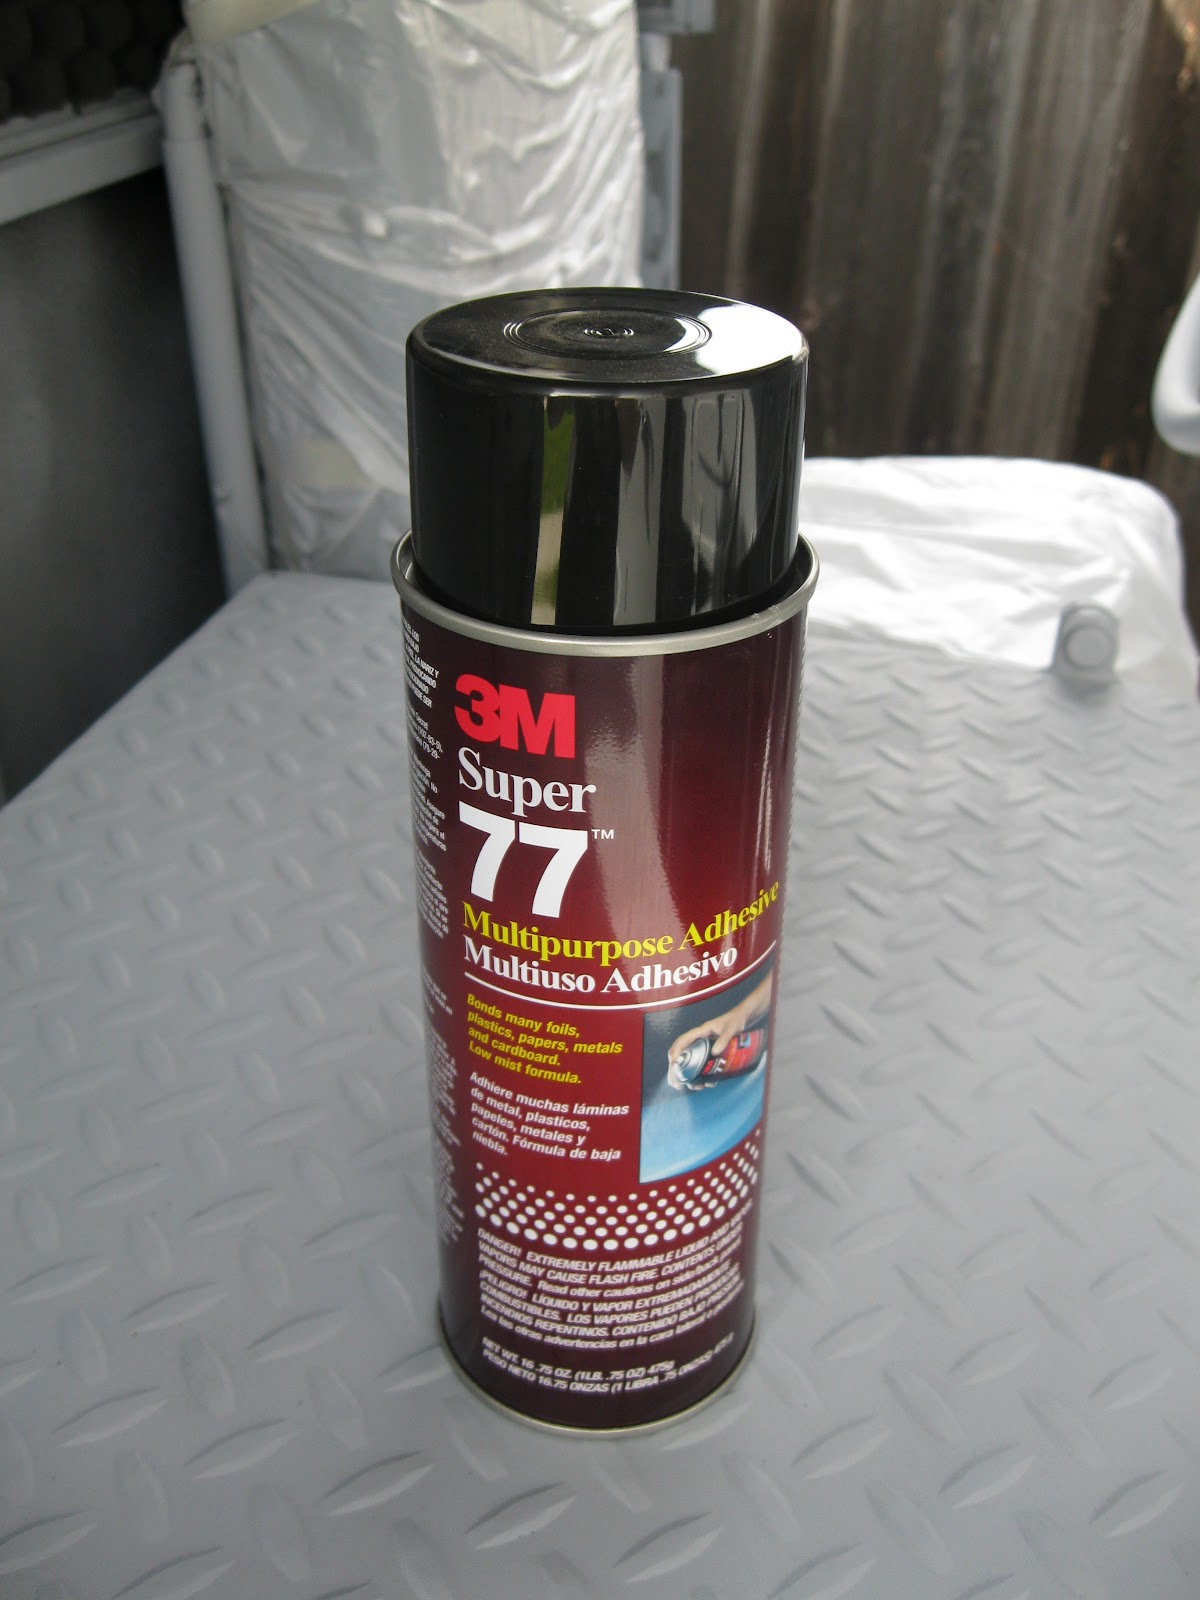
After I got most of the foam inserts in place, I then went and bought some spray on adhesive from the local hardware store.  I had a choice between the normal strength stuff, and the super heavy duty stuff.  I went with the normal stuff because of cost, and would learn to regret this decision later on.  However, blissfully ignorant of my poor choice at the time, I returned home to the Car Destroyer and proceeded to carefully pull out the foam inserts, lightly spray the wall to tack them in, and then replace the foam.  For the wall inserts this would be fine, as they supported themselves fairly well, stuffed in behind the support braces for the roof as they were.  This seemed to work fairly well, and things were looking really nice.  For the ceiling I first sprayed the back of the precut foam insert, and then also put a nice healthy coating on the roof as well.  Then, with the help of a friend, I carefully got it into place and pressed it softly but firmly against the ceiling.  It stuck right away, and I was really happy we hadn't been more than a fraction off when we pushed it into place, because it wasn't going anywhere after that (well, until the next day when I discovered the ceiling foam had fallen off in the middle of the night, but that is for another post!).  Standing back, things were looking pretty damn good.  Sure, I still had more work to do, such as the floor mats for the foot wells and so on, but the cabin had really started to take shape.  Felt good - now it was time for a long hot shower to de-paintify and celebrate over a nice cool beer!

Looking pretty good!  Sounding even better!

Wednesday, February 22, 2012

The Imperial Car Destroyer's First Mission

Just a heads up, this post is not about fixing up the old beast, but instead, about using it.  If you are only here for the restoration aspects of things, get out now.  You have been warned.  Because now, the Imperial Car Destroyer is taking on it's first mission, and crew compliment!

Leftenant Ember and Ensign Indigo reporting in Sir!
My youngest daughter Indigo (you remember her from earlier posts, the one who brought the princesses to help with the floor and the electrical installation) is a member of that elite cadre of the woman's Advanced Recon Unit, the Grrl Scouts.  Every year they do a relief mission to the beleaguered, cookieless planets of the Empire, and this year was no different.  Except for one thing.  This time, they would be delivering them in The Imperial Car Destroyer! Our local bridge crew for the Car Destroyer reported in early that Saturday morning, and we were ready to go.  Our designated pick up LZ was just down the street, so we didn't have to go far.  Leftenant Ember reported in as well, and Ensign Indigo and Cookie Coordinator Cricket completed the crew compliment for our initial fitting out.  At the designated time we fired up the Car Destroyer, let the hefty rumble of the engine fill the neighborhood, and moved out.

The Relief Goods
We arrived at the Cookie LZ (which I suppose stands for Loading Zone in this context)  without incident, although a few neighbors did stare in blank confusion as the sun was momentarily blotted out as the Car Destroyer passed by.  Massive mounds of fresh cookie supplies lay in carefully staged piles in front of the Middle School, each carefully accounted for.  As the Car Destroyer approached, the lesser vehicles scurried away from its presence, and it was able to park four abreast in front of the cookie depot.  Such is the might of the Car Destroyer.  We deployed and I opened the rear doors and lowered the ladder to enable the taking on of the Relief Goods (IE - cookies).  I was amazed at the ease of which we were able to start simply loading giant crates of cookies onto our vehicle.  Maybe I missed the part where they checked ID, but it seemed an awful lot like someone showing up in a big enough truck with at least one girl wearing a uniform could potentially walk away with thousands upon thousands of cookies.  I will make a detailed report of this security loophole in my report to Imperial Command, you can be sure!

Forming the traditional Bucket Brigade formation, we then proceeded to load the vehicle to the brim with said Relief Goods.  Leftenant Ember and Ensign Indigo were in the vehicle proper sorting the Goods into their appropriate stacks when additional reinforcements arrived.  The rest of the Advanced Recon Unit (AKA - Girl Scouts) showed up and we made quick work of the epic pile of cookies, er Goods.  We had over 1,100+ cartons of cookies, each holding a dozen boxes of cookies, each of which held close to twenty cookies each.  This means the following formula applies:

1100 x 12 x 20 = Bajillions of Cookies!

Once the Goods were properly loaded and sorted into stacks, the Advanced Recon Unit redeployed to our secondary staging area (my driveway down the street) and I loaded Cookie Coordinator Cricket (Also known as "Triple C" to her team mates) and the ladder back into the Car Destroyer and we departed.  The short trip back was uneventful - for me, the driver.  Apparently it was quite lively in the back, as we had somehow managed to overlook the fact that our wonderful ladder was not in any way secured, and at the first speed bump (there's a lot of them around a school zone by the way) it went careening off into a nicely stacked pile of relief goods and sent them sprawling.  When I opened the back at our Secondary Staging Area, it was a very frazzled Triple C that greeted me.  Still, no Relief Goods were harmed during this process (or our dear Cookie Coordinator!) so we noted the error on our part and moved forward at a brisk pace.

At this point we had the entire strength of the Troop behind us, and things started moving.  We were on a strict schedule and timeline, and were on track to meet our self imposed deadlines.  The various parents of the  Advanced Recon Unit were doled out their Relief Goods for their individual distribution points, and soon the various Lesser Vehicles that lay behind the Imperial Car Destroyer were filled to the gills with Relief Goods, like so many mechanical suckling piglets come to mama.  This process took a little over and hour, closer to two, but we got it done in good time.  Spirits were flying high, and indeed morale was up across the board.  You could practical feel the espirit de corps as the Troop broke into some of their favorite work songs.  Indeed, it was a good day to be a member of such an important Relief Effort.

 Members of the Advanced Recon Unit on their Relief Mission to the Planet of Santa Cruz

As the unit dispersed towards their individual distribution nodes, the remaining core Bridge Crew for the Car Destroyer geared up for the next part of their operation - an in person delivery to the great center of learning on this planet, the Forested Library Moon of UCSC.  Now, it should be noted that the Import Export regulations on the Forest Moon of UCSC are very strict, and they do not allow any nuclear weapons or devices of any kind.  We double checked our Relief Goods manifest, and were relieved to see that none of our imports contained such banned ingredients.  Other than being "criminally tasty", they should pass inspection.  We loaded the Leftenant and Ensign in the back with Midship Woman Veronica (whom had arrived at the Staging Area earlier) and Triple C joined me in the Command Cabin.  We then moved out, plotting a course towards the Forest Moon.

We parted the seas of traffic before us, and began the long ascent up the steep hill towards where the main campus lay.  Slow though we may be, nothing would stop the Car Destroyer.  Heads swiveled and eyes bulged as the Car Destroyer gracefully (read - loud and mighty) moved through campus.  Startled herds of Freshmen scattered as we arrived, and soon we found our berth behind the mighty grey edifice of Engineering 2.  As Captain, I stayed with the vehicle as the rest of the Bridge Crew unloaded the Relief Goods.  As the sun set through the boughs of the redwoods, the dappled light casting both shadow and light over the bulk of the Car Destroyer, I knew it was a good day to be part of such a glorious effort.  My chest swelled with pride at the honest, hard working task accomplished that day.  Indeed, the might and wisdom of the Imperial Car Destroyer is second to none.

The Imperial Car Destroyer delivering Relief Goods to the Forested Library Moon of UCSC

The Right Tool For the Job

Greetings once again!  I am happy to report that I am having troubles keeping up with the progress on the truck. This is good because #1 - It means I am actually continuing to make forward progress, and #2 - I continue to write!  I plan on writing more often, and perhaps in slightly smaller chunks, in an effort to stay up to date on all of the activity while it is fresh in my mind.

When last we left our stalwart heroes, they were deep in the throws of dealing with the recalcitrant Foam from Hell, so that's where we will pick back up.  If you remember correctly, I was using a heavy duty scraper and manually trying to prey loose the caked on foam from the metal cabin of the truck.  I had hit upon the trick of using some acetone to denature the old adhesive, but it was still a long, tiring, slow process.  Well, it turns out I was going about things all wrong, and what I needed was the proper Tool for the Job.  Imagine, if you will, that I am a lone Infantryman in the Line Company for the Imperial Car Destroyers compliment of marines.  Imagine further that I am being faced with a large tank bearing down on me, intent with my destruction.  My heavy duty hand scraper and acetone was the equivalent of being armed with a sharpened spoon against the oncoming armor.  Okay, with the addition of the acetone, I'll give you a sharpened spork, but no more.

I'm calling in Air Support!
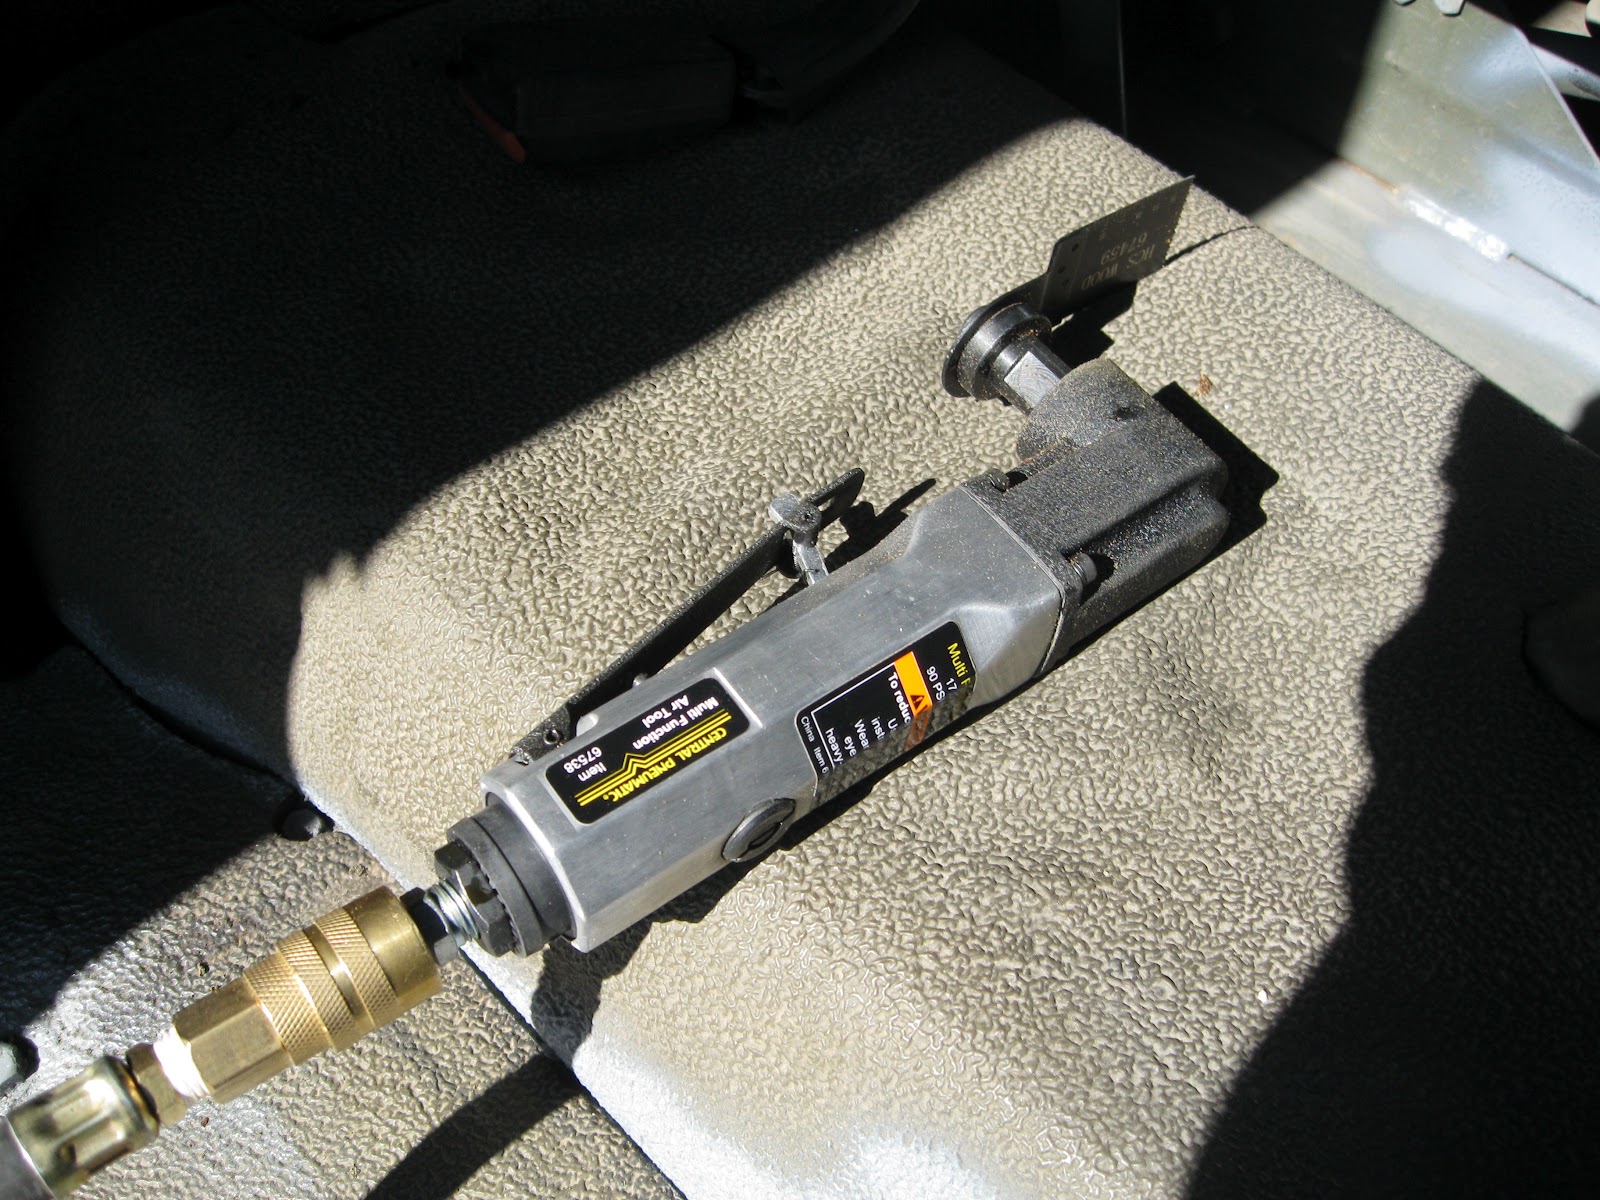
What I needed was some serious fire power.  What I needed was air support.  Specifically, a nice Variable Speed Multifunction Air Tool from Harbor Freight.  This thing is basically just a small hand held wand that vibrates at up to 17,000 oscillations a minute (don't get too excited now Grrls).  It has a simple single allen bolt head that takes a variety of attachments, transforming it from a cutting device, to a scraping device, to a sander.  I had already purchased a 25 gallon, 5 HP air compressor on eBay from a local bloke in Scotts Valley, so I figured I would give it a shot.  Boy, was it the right thing to do.  I bought a 1-3/8" Multi-Tool Plunge Blade for it that was technically for wood, but it looked like just what I needed.  This showed up in the mail mid week, and by the weekend I was ready to rumble.  It should be noted at this point in our story that my wife is starting to freak out a little bit about how many boxes of tools and parts are arriving at our house.  Daily.  Twice a day even.  When she suggested I might have a problem, I might have laughed maniacally and went outside to play with my air tools.  I couldn't really tell you for sure, I was still riding the high of my mighty power - I no longer had a sharpened spork, I had AIR POWER!

This took minutes, I shit you not!
So, early Saturday morning - no, I lie.  I wasn't early at all, it was something like the crack of noon.  So, early at the crack of noon, armed with my new power, I fire up the air compressor, attach my new multi-function air tool, with plunge blade attached, and go to town.  The thing fires right up, vibrates like hell, and cuts right through the foam like it wasn't there.  The metal blade glides through the foam, cuts through the nasty adhesive, and skitters off the metal underneath.  Sure, I scored the metal a little bit, but it got the job done!  In less time than it took to write this paragraph, I had the first section stripped and done.  What had taken me hours was reduced to the mere effort of minutes.  I was astounded.  I mean, I had hoped it would be easier, but this was ridiculous.  Not that I was complaining mind you, I just felt a little foolish for having suffered through the lame manual way before, but I figured nobody would know.  It could be my little secret, that I had wasted days of effort in vain because I was using the wrong tool.  I mean, it wasn't as if anybody was going to post it on their blog or anything, right?  Right?

Well, after the initial euphoria wore off, I got down to business and went to town.  Nasty old foam was flying left and right.  It didn't stand a chance.  What had once been a rebel hold out of opposition was annihilated in no time at all.  I was giddy with excitement.  I followed up the operation with my newly purchased shop vac and sucked down the offending bits of left over foam that were too small to simply toss out of the truck.   I then came back and attempted to sand the sections smooth, but discovered that many of the roof panels had a severe angle in them, and were in tight spaces, so this became untenable.  Instead I went back with the multi-tool and the plunge blade and used it as shaver to get rid of the remaining foam.  This thing can do anything!  Well, okay, maybe not anything, but it was certainly the Tool of the Hour.  Soon I had all of the upper foam sections out of the cabin, in fact I had all of the bits of foam I had targeted for execution out and done with.

Not wasting a moment, I busted out with some rust resistant primer and coated the now bare metal surfaces with some paint.  I was planning on painting the entire interior of the cab anyways, but I wanted to make sure no bare metal was left unprimed.  Luckily primer dries pretty quickly, and I didn't have to be too picky with its finish, as I was planning on putting foam over these sections anyways.  Not to be stopped, I went ahead and added the remained of my DynaMat to the newly exposed and primered cabin panels.  This process basically entailed taking measurements, not screwing them up, cutting sections of DynaMat (see my previous posts for this Wunder Product), removing their adhesive sticky backing, and putting them in place.  It took me a while to do it, but as I did not run into serious difficulty doing so, and I have covered it before, I won't bore you with all that many details along the lines of and then I put on another piece after having cut it, and then I tied my other shoe, and then...  etc etc.  Needless to say, it turned out well, and I could have bought a lot more DynaMat (with an unlimited budget, let's lie and say I did, okay?).  It was starting to come together!

This was the unmitigated success I was looking for after last weeks mostly useless effort.  It felt good to be one of the Good Guys, riding high on my success.  Next post I will cover prepping and actually painting the cabin's interior, and installing some sound insulating foam.  Until then, soldier on mighty Spork Warriors!

Saturday, February 18, 2012

A Weekend Lost

There comes a time in every Project of Magnitude where everything lines up, everything goes your way, and all you try is easy and successful.  Where you have all of the right parts, the right tools, and no bolts are seized, and all is well and right in the Universe.  A time of joy, and unmitigated success.

This was not one of those weekends.

My daughter Ember, saying goodbye
to the YarMini...
Everything was lined up to be another productive weekend working on The Imperial Car Destroyer.  I had sold my Mini Cooper on eBay, and the buyer was showing up in the morning to purchase the vehicle.  I had received my case of DynaMat and was itching to work on the interior of the cabin.  I had the sun shining in my hair, and the world was my oyster (WTF does that expression mean anyways?).  The Universe, however, had other ideas.  First disaster is the arrival of the Grumpy Russian (tm).  He was to buy my Mini, and I was excited/sad to see it go.  I have been a classic British car guy for close to a decade now, and that little beast and I had been through a lot.  Truth be told, it was the end of an era.  From the moment Grumpy Russian (tm) pulled up in his $45k SUV, I knew things were about to go pear shaped.

Ends up, he had never owned a British car before, and was buying this one for his daughter for her 16th birthday.  I blinked several times when I heard that.  Might as well get your son a used Main Battle Tank as well while you are at it.  The two ideas are almost on par with each other.  Anyways, he proceeds to find anything and everything wrong with the car he can, and generally insults me with his thick heavy Russian accent in the process.  I guess somehow he was expecting a car that was showroom quality, everything gleaming and factory new, and powered by Unicorn magic.  News flash people - forty year old British cars take work - and even the nice, clean, working ones like mine have their blemishes.  The deal fell through, and I was back to the drawing board with needing to get my old car sold, so I could pay off the truck (...which I have intelligently purchased on a credit card so far.  Me iz smartz).  The shitty thing is, I went on Craigslist and eBay and looked at other classic Minis being sold, and I am right in the right spot, even a little below what other people are asking.  Oh well, at least my truck still loves me.

So, off to work on the truck at last.  Now, the night before I had shown off my cool shore power setup to my gamer friends that were over, except that when I threw the knife switch to turn on shore power, I got squat.  No lights, no power.  I smartly didn't do anything about it late at night, but decided to look into it during the day, post Mini fiasco.  I was just opening shop and getting my tools out when my buddy Joe showed up with his other friend Joe.  The Fates had thrown me a bone, the Master Electrician showed up just when I needed him.  We then proceeded to look into the issue and spent the rest of the day trying to track down what had happened.  Here is basically what was going on.

Sorry GFI Circuit...
Somehow I was now getting something on the order of ~617 miliamps of current through the system which had not been present before.  It is basically nothing, static in the wind as far as current goes, but it was enough to trip the GFI circuit we had installed each and every time we tried to switch to shore power.  24V truck power still worked fine.  We merrily went about isolating every single thing we could, going so far as to unplug and uncouple everything we could get our hands on, but all to no avail.  Somehow the ~617 milivolts kept on showing up.  So, in the end, we decided on the short term fix of simply replacing the GFI outlet with a normal outlet, and buttoning everything back up.  It was getting close to dark at this point, and at the end of that miserable day I was at slightly behind where I had started, and my spirits were a bit low.  I decided to call it an early day and go inside to drown my sorrows in beer and gaming.  At least they still love me!


Okay, next day, waking up refreshed and willing to get back on the metaphorical horse (this one just happened to weigh 15,500 lbs) I got back to it.  I decided to attack the cabin once more.  I have already mentioned what a bitch it is to remove that old foam in my previous post, and today proved no exception.  Undeterred however, I plowed onwards.  I removed the fire extinguisher mount on the curved passenger side of the cabin, near the door, and then proceeded to attack the caked on foam underneath.  It took some time, but with some acetone, a heavy duty scraper, and a hammer, I got the job done.  I was sweaty and covered in ancient foam flakes by the end of it, but I had met with success, of a sort.  I sanded the sucker to metal in most places, then cleaned it up and put a coat of rust resistant primer on it for good measure.


I had received my package full of DynaMat in the mail that week, so I was obviously itching to use it.  I ripped into it, and was surprised to discover it was not what I had envisioned.  I bought it simply because everyone I spoke to told me "That's the stuff to get", and I believed em.  Turns out, they were right, I just had a different idea in my head what that stuff was going to look like.  My imagination conjured up some Wunder Foam with Uber Insulation, but in reality I got large sheets of dense tarry rubber stuff with a giant peel off sticker on the back.  For all the world, it looked as if I had just bought several giant sheets of black eraser goo mixed with modelling clay.  You see, how it works is that it deadens the actual body panels it is attached to, making them more resistant to vibrations, and more dead to sound.  Crazy cool stuff, and actually very easy to work with.  One Super Pack got me nine sheets, which I had no idea if that was too much or too little at this point.  A lot would depend on whether or not I could put my new insulation right over the old foam and call it a day.  With my mythical, dreamed up Wunder Foam, I thought it could work.  Looking at the dense, tarry DynaMat in my hands, I realized that just wasn't going to happen.  The DynaMat only really worked if it was put right on the body panel to be deadened.  Placing it on top of the older foam would be like pouring jet fuel into an old truck.... oh wait, I can do that.  Well, pick a different metaphore then.  ;)  I did push forward and get the two foot well sections cut out and installed.  I had already done the work of prepping those areas, and I was going to be damned if I didn't get some of this stuff installed, even if it was going to take me a millennium to get the rest of the foam off.  The driver side was particularly difficult, as I had to have cut outs for the various pedals and what not that live there.  First attempt I did all of my measurements totally bang on, made the cuts, only to discover to my horror that I had cut it sticky side up, and the damn thing was upside down.  *groan*  The second time I nailed it though, and it looked pretty good.


At this point I also noticed that the edges of my windows were covered in rust, and in some cases whole chunks were missing due to the corrosion.  Obviously something had to be done.  I attacked it with a sander, then cleaned it up with some sand paper by hand, and then blew it off with my air compressor.  It wasn't pretty, but at least I had gotten rid of the larger chunks and flakes of rust, and had a surface I could work with now.  I then hit it with my favorite nasty die-if-you-ingest-it chemical, Loctite Extend.  It worked its transformative magics upon the rust and turned it into not-rust.  I then hit it with some more rust resistant primer as well.  Now, a note about these windows.  They are cool.  I mean seriously cool.  You can not only fold them down entirely and bolt them to the hood of the engine, allowing you to drive like some crazy Mad Max bad ass getting bugs in your teeth and wearing goggles which you can't see out of, but you can also hinge them forward so they are propped open from the top, allowing air to get in along the bottom.  I'd like to see you try that in your Toyota Camry, ha!

At this point darkness threatened once more, and I called it a day.  At least I had made some progress, even if it fell far below what I was hoping to accomplish.  Actually, reading back on this post, I have to say it wasn't nearly as bad as I felt at the time.  I went to bed that night in pretty low spirits, but upon more mature reflection, I did indeed get some shit done.  I had installed my first two pieces of DynaMat, cleaned out yet another section of foam, and dealt with some rust issues in the cabin.  I had also got my damn shore power working once more, but that didn't seem like as much of a win.  Getting something working that had previously been working was not my idea of progress, although I should know better, working as a software engineer for the last decade plus.

Next post I will make up for lost time in a BIG way, and get the project rolling again.  So, stay tuned, and remember, report any Rebel Scum you come across to your local Storm Trooper Authorities at once!

Tuesday, February 14, 2012

The Foam from Hell...

A quick update on some more of the work that has been accomplished/attempted.  I had hinted last post that I was going to encounter some serious resistance to Progress when I attempted to tackle doing the sound insulation in the cab interior, and that's no joke.  I am going to get into it a little bit more now and describe in some more detail how my expectations of an easy job were so far off the mark.

I had already removed the passenger seat at this point, and was amazed at the thick layers of dust, dust and more dust that covered everything.  The cabin had 1/4" foam installed in it to provide some modicum of sound insulation, as well as some padding (not much) for its passengers.  However this foam was ancient (most likely just as old as the vehicle, so over forty!) and was completely worn through in several locations, such as the foot wells on both the driver and passenger sides.  So I figured I would rip it all out and replace it.  I mean, how hard could it be, right?

Correct answer:  Extremely.

Making progress now!
At first I just tried pulling up on the foam, but as you might expect, I was rewarded with only little bits of foam ripped off in my hands for my efforts.  As it aged, the foam became brittle and more prone to ripping - at least the top part did.  The bottom part had become one with whatever crazy military grade adhesive they stuck it to the floor with.  Undaunted, I got out a large scraper and started jamming it under the foam, shoving with all of my might to scrape it clear of the metal underneath.  Work was super slow, and I quickly realized the little cheesy scraper I was using wasn't going to cut it, both literally and figuratively.  I popped out to the local hardware store and bought a heavy duty scraper, and some acetone.  Returning rearmed, I had another go at it.

This time I made more progress, and was able to get most of the foam out of the passenger foot well where I had been working.  It had easily been over and hour or two, and I had barely cleared one small section.  Additionally the section that I had scraped clear still had a thin layer of ancient adhesive with foam stubble on it, looking for all the world like some scraggly ass beard a teenage troll might try to grow on his sixteenth birthday.  Improvising, I decided to try to simply sand the hell out of it and see if it worked.  Pulling out my trusty orbital sander, I got down to work.  After a few minutes noisy sanding, I had penetrated the nasty layer of glue and stubble, and had nice clean bare metal beneath it!

Now that I was down in it, I started to see little bits of rust here and there, especially in the cracks where the foam had come up a bit over the years.  I blew everything out with my air compressor as best I could, and then applied some of the miracle fluid, Loctite Extend and let it dry.  Once it had I grabbed my can of rust resistant grey primer and coated the now rust free areas in a protective layer of paint.  I also spray painted the freshly bare passenger foot well as well.

One prepped passenger foot well ready!

Now that I had a system worked out, I attacked the other major problem spot, the driver side foot well.  This time I added a step where I first soaked the foam in a little bit of acetone before proceeding with the heavy duty scraper.  This helped A LOT, and I started to make some real progress.  It was at this point where I recognized that it was possible to keep a layer of the more heavy duty paint (looks like bed liner paint perhaps) that the army had coated the floor in if I was real careful in how I scraped and then sanded.  So, with a little more delicacy (as much as you can have grunting, pushing and shoving a bladed spatula under resistant ancient foam) I was able to salvage some of the original protective paint and not take it down to metal.  I finished up by spray painting the driver's side foot well with primer as well.  Was looking pretty good!

At this point it was getting late, I had been at it for hours and hours, and I had barely managed to clean and prep to small areas.  Looking around at the rest of the cabin interior, I started to reassess my overall strategy for what I was doing.  I hadn't received my sound insulation yet ( had purchased some DynaMat on Amazon) and I was now having thoughts along the lines of "Perhaps I can just leave a lot of this old foam in place where it's not so bad and put additional insulation over it..."  More next post on why THAT particular idea didn't work, and why the next weekend's worth of work felt a lot like spinning my wheels in place and going no where.  Fun fun fun!

As usual, thanks for reading along, and I will try to have the next post out as quickly as possible!

God, that took a lot of work...