Tuesday, February 7, 2012

New Floor, and a Bunk Bed!

Greetings and Salutations loyal citizens of the Empire!


Last time I left us at a freshly painted interior to the koffer (van body), and ready to put in the linoleum.  So, that's exactly where I will pick up once more.  However first I needed to attend to one small detail before I got down to the business of making the floor look pretty.  That was the minor issue that the 1/4" plywood I had purchased as the base of the floor was coming up in a few places.  Two to be specific.  Directly over the rear set of wheels the floor was a metal plate, basically the top part of the wheel well.  I had tried to put down enough construction adhesive that I had hoped it would glue it into place, but it was sadly not to be the case.  Thus, I had to come up with a solution - and fast - before I made the problem much, much harder to deal with.

Bolt securing the floor
After some consideration, I decided to keep it simple.  I drilled a couple of small pilot holes through the plywood floor, and through the steel wheel well beneath it.  I then went to the hardware store (I am getting to know them all by name at this point, and I am developing likes and dislikes for the various hardware stores in town) and picked up a few bolts of the appropriate length, a few rattle proof nuts, and some Locktite.  Grabbing the Makita cordless drill, the problem was dealt with rapidly, not counting the rapid trip to to the store.  That problem dealt with, I was finally able to move on with the floor.

Drop line in place, first tile down
I had bought the linoleum from Home Depot, whom I know I am supposed to despise, living in Santa Cruz and all, but the truth of the matter is they have a knowledgeable helpful staff, are laid out in a logical manner, and have a great selection.  So there, I said it.  Anyways, I decided to buy the "top shelf" linoleum at just under a dollar a tile (which are one square foot).  With the interior space being basically 8' X 12', that meant I had 96 sqr/ft worth of  tiles to buy.  Erring on the side of caution, I bought about 106 tiles, and called it a day.  I also picked up a blue drop line so that I could stand a remote chance to making the thing vaguely square.  Another thing of note.  Large stacks of linoleum tiles are surprisingly heavy!  I had somehow convinced myself that since they weren't the "real thing", they would be somehow lighter and flimsier.  Not so!

Traffic Master, mastering your traffic
since 1901
The actual laying of the linoleum tiles is very rewarding.  You get the joy of laying down tile, without all of that annoying grout, tile saws, and so on.  You also get to feel like a little kid playing with over sized stickers, as you peel off the wax paper backs and hold a one square foot sticker in your hands.  And hey, who doesn't like stickers?  I also learned that placing your very first tile is probably the most important aspect of the entire job (outside of laying the drop line perhaps).    I did a pretty good job lining it up, and didn't think much of it at the time.  I was probably within 99% of getting it exactly right.  However, that 1% over twelve feet of tile can add up.  Not much, but it does.  Another thing of note is the decision on how to lay out your tile.  After consulting with Cricket, I followed the general convention of starting with the first tile right dead center of the room, and working out from there.  Yes, I would have to cut "tile" on both sides of the room now, but those areas would be hidden under tables, lockers, bathrooms, and so on.  So, after a lot of setup, the actual tile laying went really fast.  I was assisted by my ninja daughter Indigo, and things went pretty fast.  It was still dark by the time we finished, but only just.  At the end of the day,  I had about a 1/2" drift over the 12' length of the koffer.  I was cutting tiles for 3.25" on one side, and 3.75" on the other.  Not so bad, and as I mentioned, all of this will most likely be hidden under desks and bunk beds and what not.

Indigo Ninja approves of this floor!

After the floor was in, I went inside to spend some time with the family, then collapse for a while.  In the morning I woke up refreshed and revitalized, ready for more action.  Cricket showed up with a bunk bed from Ikea - the same one my inspirational Canadian used in his build - as well as the 'under bed'.  Bright shiny new day, we got down to opening up the massive cardboard boxes, reading the wordless Ikea instructions, and then putting the thing together with the provided generic Ikea Allen wrenches.  Things went pretty well, with Cricket's help (officially in charge of the Procurement Department from now on), as it required having someone hold parts of the thing while it got screwed together.  All in all, it went together without much fuss.  At this point in our lives, we had both put together plenty of Ikea furniture, and after a while, they all start to look the same.  After an hour or so, we had the bunk bed built, but not bolted in.


Well, that about sums it up for that weekend.  Mission accomplished.  Floor was down - the bed was made, and the back was generally coming together.  Next week I would face my first real challenge.  A challenge that could kill the project before it even really get off the ground.  A challenge so deadly most everyone has a horror story of their own to share.

The DMV.

That's right, I still had to get legal.  At this point in the timeline of the vehicle, I had already been to the DMV twice, but this third and final trip would be the deal breaker.  Is it an RV (Motor Home), or is a commercial vehicle?  You decide.  I wish.  I will give you a full run down on the "Imperial Entanglements" of the legal system and how it relates to purchasing old military vehicles next week.  I can give you a sneak spoiler though - it all works out eventually - otherwise I most likely wouldn't writing this blog.  My body would be found hanging from inside the van body.  ;)  I leave you with this moment of domestic bliss, as I, your fearless Captain of the Imperial Car Destroyer and the Head of Procurement share a moment in the midst of building Das Bed.

The Captain of the Imperial Car Destroyer
and the Head of Procurement sharing a moment


Thursday, February 2, 2012

Time for some paint!


Indigo Sol (left) and Mari-Lu (right)
Greetings once more!  Well, with the rust in the van body (which the German speaking overlanders call a 'koffer' unless I am mistaken) and getting the new floor in, I figured it was high time for some new paint.  I have a Benjamin-Moore color wheel, and have used the paint in the past, so that's where I started.  I decided I wanted something on the lighter side of the color spectrum, as the van body didn't get a ton of light, and I didn't want it to feel dark and oppressive.  After knocking a couple of ideas around, I decided on a light grey with a hint of blue in it, taking the suggestion from my awesome partner Cricket.  Decision in hand, I headed down to my local paint store, and had them make up two gallons of the stuff for me.  I had a pair of awesome helpers at this point, my youngest daughter Indigo Sol, and our neighbor Mari-Lu, as well as all of their girls/princesses.  Yes, the Imperial Car Destroyer had a serious infestation of girly cuteness.  Such is my life.  ;)

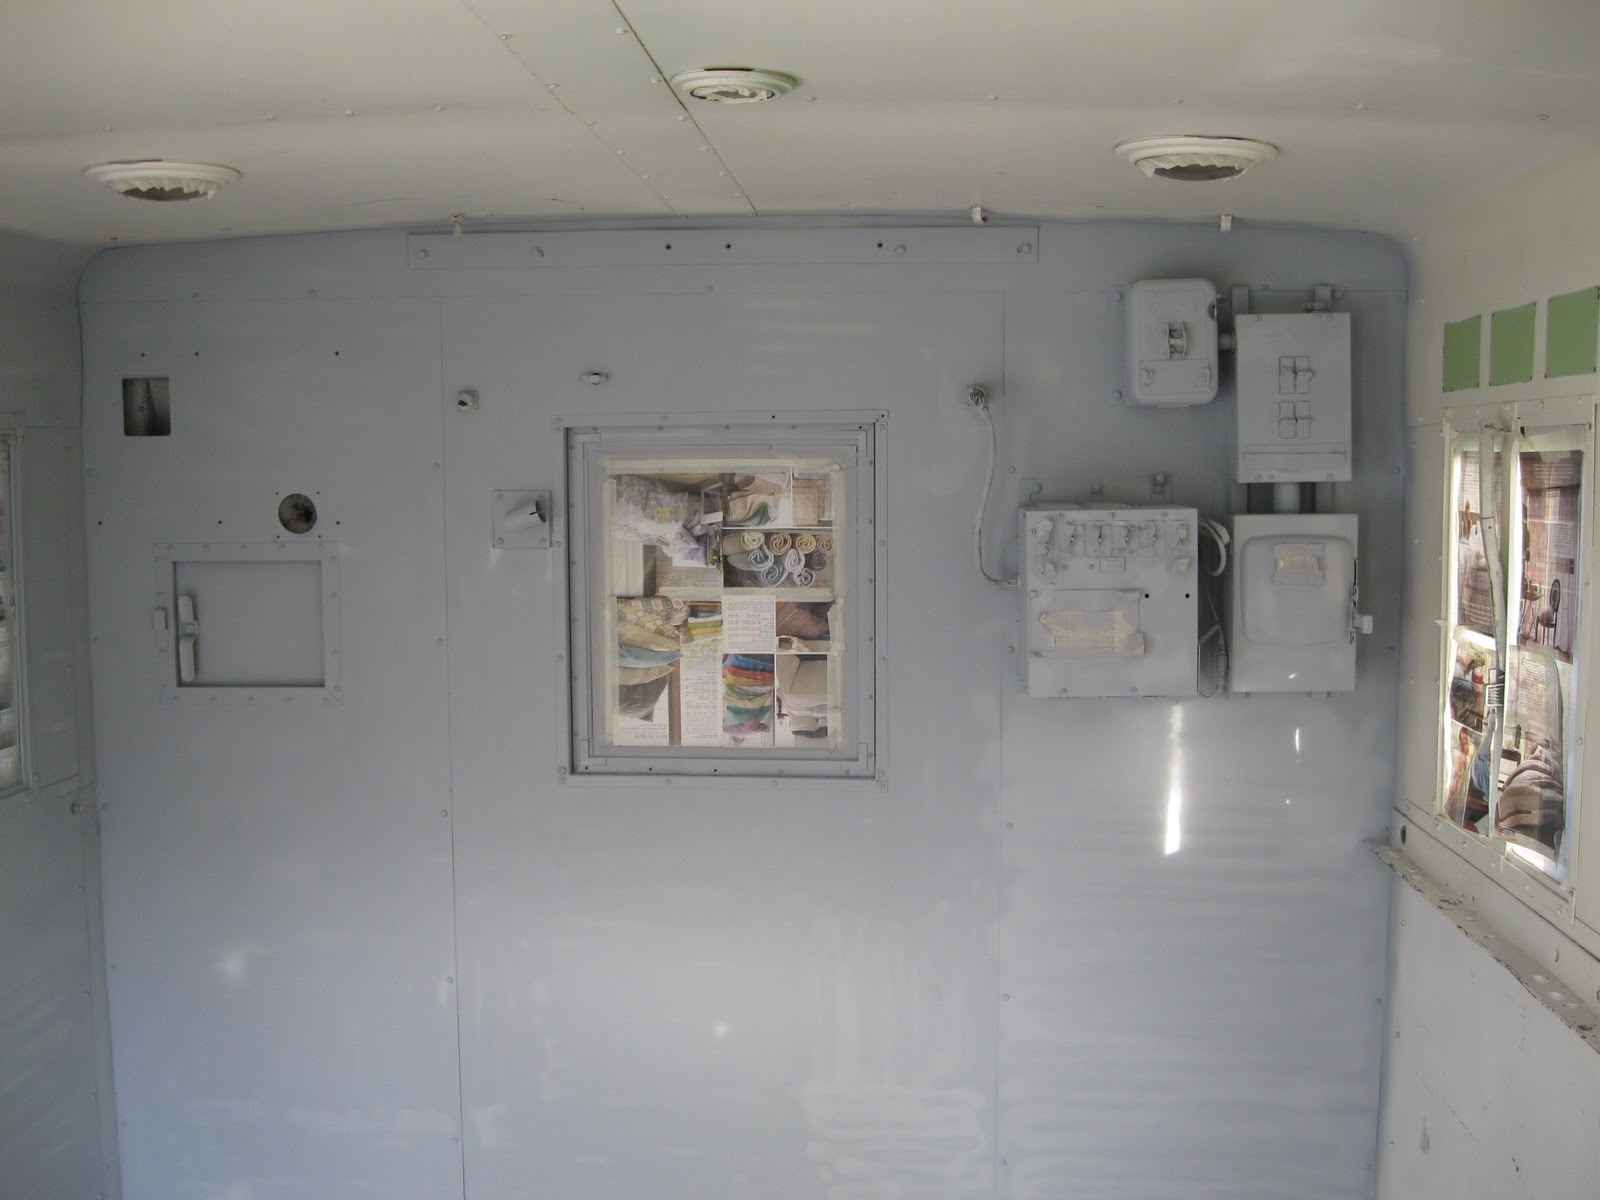
Paint in hand, and back from the store, I prepped the interior of the van body and started masking off the windows, the data plates, switches, and so on.  This was the boring, but amazingly essential part of painting.  I had selected eggshell finish paint, as to avoid that glossy "bathroom" look, but still have something that wouldn't instantly pick up and retain any dust that flew by it, which I expect to be a lot in the lifetime of the vehicle.  I purchased an HVLP (High Velocity Low Pressure) automotive paint gun from Harbor-Freight, and I was dying to try it out.  Pulling out my trusty air compressor, I got the gear ready.  Air tanks full, neighborhood alerted "that crazy guy" was at it again, I decided to do a final inspection of the vehicle before painting.


Walking back through the interior I noticed a few shelves I had missed mounted to the far wall (closest to the cabin and the front of the vehicle) that I had not removed.  Sighing, I went and grabbed my screwdriver and proceeded to pry them loose from the wall.  It looks like this vehicle had been outfitted for cold weather, and had a pair of multi-fuel diesel heaters mounted in them.  That's right, a pair of them!  Unfortunately, the heaters themselves were missing, but the mounts for them were present, along with the exterior breather tubes, and the electric box was wired up to support a pair of the units as well.  There is even the external fuel pump mounted to the outside of the van body piped into the main fuel tank already.  I plan on eventually tracking down one of these units and using it as my main source of heat, but they are hard to find.  With luck I will find a lead on Steel Soldiers.  I have saved all of the parts (of course), and hope to track down one of these heaters, hopefully used.  I am still in the process of finding out, but I think I was lucky enough to stumble into a truck that has had the "arctic weather treatment" package upgrade performed on it.  Don't quote me on the name though, I am still learning a lot about these old military trucks, much of it on the fly as I work on them!


Task performed, I noticed I had failed to leave a cut out for the actual door latches in my shiny new floor.  In other words, I could not currently close my rear doors!  Oops!  And of course, I had just finished gluing it to the floor, and screwing it in place with roughly 1.2 million deck screws.  Thinking fast, I grabbed my Dremmel and a few cutting wheels, and corrected the problem.  Over corrected in fact.  Oh well, at least the doors could close now, and such is the nature of projects sometimes.  Since I was there, I went and did some touch up sanding, hitting the sections of the wall that were previously covered by the diesel heater shelves and so on.  This time for sure, I was ready to paint!

Ember helps with the last of the masking!
Windows covered in old magazine print (pages from one of those annoying free catalogs that seem to plague modern existence, the paper spam of a bygone age), walls sanded, outlets and switches masked off (mostly), it was time to begin.  My oldest daughter Ember showed up to help with the final prep work, which was greatly appreciated.  Clearing out all of the tools, the rolls of masking tape, and the children and lingering princesses, I fired up the air compressor and got to work.  Now, some things you should know.  First - I have never done this before.  Second - I really need to get a dedicated outlet, preferably in 220V and exterior mounted on a dedicated high amperage fuse.  Third - I have a mild form of insanity that causes me to buy old military trucks and not take no for answer.  Add all of these together, and you have an air compressor that runs great until it hits its desired pressure load, turns off automatically, and then when it tries to turn back on, trips the circuit breaker and just sits there.  It meant I had to try and constantly run the air gun, trying to keep the tank under load so that it wouldn't turn off and then try to start up again, and die.  Plus side, I worked non-stop for hours and got the sucker done.  Down side, way  frustrating.  I am going to call an electrician friend of mine and have him get that dedicated outlet done, I swear, but that wouldn't happen today, so there was nothing to it.

First coat is on, beginning of the second day of painting...

Finally, the ceiling is done!
It took until hours after nightfall, but I got the deed done.  As you can see in the images, more than one coat was going to be needed.  I pushed on, rinsed out the HVLP paint gun, and buttoned up the truck for the night.  The shower that night felt like paradise.  New day, new coat of paint, and I got back to it.  It should be mentioned that I spent some time that morning trying to fiddle with the various adjustments on the paint gun, attempting to get exactly the right mixture of air, paint, spray width, and pattern.  I used a few card board boxes as test surfaces to paint on, since I couldn't really tell what was going on when I sprayed the walls proper.  Firing up the air compressor once more (Ah, Sunday mornings wouldn't be the same without their dulcet tones), cranking up the small speakers playing Pandora from my phone, I worked my way through the second coat.  The second coat seemed to go on much faster, but as usual, the ceiling seemed to take forever.  Maybe it's just that you have to do the whole thing holding the paint gun over your head most of the time, or the fact that there aren't any windows to break up the space (and thus reduce the total area you need to paint), but the ceiling was a chore.

Now, something I should have mentioned before that is just too cool for words.  This truck came with its own mascot.  Not like some weird high-school dude wearing some plush velveteen suit or anything, but an actual painted by her original crew mascot stenciled on the inside of the van body door.  It depicts, humorously with a violent macho angle to it, a muscle bound bunny rabbit flexing for us, wearing a military helmet of some sort, with, and I shit you not, the words "BAD ASS" custom stenciled below it.  This, pretty much, was so bad ass it had to be saved.  Not only saved, but revered and enshrined.  Thus I made sure not to accidentally spray paint over it or anything stupid like that.  It is my plan to buy a crazy metal frame and bolt it to the door over the muscle bound long ear.  We decided his name was "Babs", which stands for Bad Ass Bunny Specialist, if you must know.

All hail BABS, Official Mascot of the Imperial Car Destroyer!
Well, I had intended to get to laying down the linoleum this post, but it looks like I waxed poetic for too long covering the paint job.  Oh well, more for next time!  Stay tuned for our next exciting episode, where in  we discover we have not completely glued our new floor to the metal deck plates (the tops of the rear wheel guards), we look at a couple more ugly worts pertaining to the floor, and then we say "fuck it" and cover the whole thing in linoleum anyway and make it look beautiful.


Tuesday, January 31, 2012

The Restoration Begins!

So, where to begin working on a 7-1/2 ton forty-seven year old military truck you may ask yourself?  Well, at least that's what I asked myself when I awoke the next morning after it arrived at my house and realized it wasn't going anywhere without my help.  The answer was actually quite simple.

You do whatever you have to do to make it legal first!

Everything else second.  In that regard, I had to prove to the DMV (in other words The Man) that my vehicle was an RV.  This is because if it's an RV, I don't need a new classification of license (Class C license are fine for motorhomes under 42' long), it won't be a commercial vehicle (and pay registration by the tonnage - which equated to a little more than an additional thousand dollars per registration!), and in general will avoid an entire boat load of potential legal entanglement.  So, commercial bad, RV good.  But what in the world makes a vehicle an RV?  Ends up, there isn't a hard and fast definition according to the DMV.  The DMV employee I spoke to said basically, "As long as it's not a sleeping bag thrown in the back of a pickup, and actually looks more permanent, it all good."  I am, of course, paraphrasing, but that isn't far off.

The original interior, wooden planks and all!

So, I start by fixing up the interior of the van body, with the aim of getting a permanent bed bolted to the interior as quickly as possible.  The interior had been painted a sloppy white sometime in the last twenty years, and had been 1960 lime green before then.  God knows why the military chose some of the colors it did forty years ago, but I can tell you the original colors were truly hideous.  It looks like some rushed recruits slapped some white paint on with brushes over the original paint scheme, and then proceeded to do their biznatch (like repairing jet parts) for the next twenty years or so.  To say that everything was grimy, covered in dust, and banged up to hell didn't quite cover it.  It was, however, a place to start.

Let the restoration begin!
So, after sweeping out the interior, I decided to take my new 25 gallon air compressor and air sander out for a spin.  I basically attacked everything within sight in the van interior, floor, walls, doors, etc.  I went through several sets of sand paper, and covered myself in layers or old dust and paint.  My goal was not to sand it down to the metal or anything foolish like that, but just to get enough of the grime off that I could paint over it effectively.  It took some time, as the interior dimensions are something like twelve feet by eight feet, but eventually I got enough done to proceed.

Nasty, nasty rust!  Must eliminate!
The floors are made of wooden planks (like an old sailing ship!) with two metal sections that are literally the tops of the wheel wells over the rear eight wheels (four to the rear left, four to the rear right - gotta love three axle vehicles!).  The interior walls are metal sheets riveted together, with a little lip at the bottom that bolts to the plank floor.  It is here that I found my first signs or real corrosion and damage.  Basically most of the metal had rusted to nothing in several of these places, and had to be dealt with.  I was planning on putting in a new floor of 1/4" plywood and linoleum, but I knew I couldn't trap all of that rust under there and expect things to turn out well for me in the long run.  Thus, it had to be dealt with.

Alchemists eat your heart out!
 So, I knew I had to buy some gear to make the floors, but I also knew I had no vehicle besides my as-of-yet-not-registered army truck that was capable of carry back the three 8' by 4' sheets of 1/4" plywood I was going to buy.  Realizing there was little other available options (outside of strapping the plywood on the roof of my mini or motorcycle) I girded my loins and took the truck out for its first real spin.  I think I drove around the block a dozen times, ground the gears about twice that, and then eventually figured out that I was in Low Gear the entire time.  Switching to High Gear, I confidently set out to Pro Build to buy my supplies.  I made it there, didn't crush anyone in the process, and didn't get pulled over.  I even made it back!  In the end I purchased the plywood, some tubes of construction adhesive (to glue the floors down), a ton of deck screws, and some Loctite Extend Rust Neutralizer.  This stuff is the bomb.  Basically you paint it right on to the rust, and it magically transforms it into inert, paintable non-rust.  It's like alchemist's gold in a bottle!  A few coats of that, and then waiting for it to cure overnight, and the rust had been dealt with.  I finished up by spray painting it and the tops of the metal wheel wells with rust resistant black automotive primer.  The interior was now ready to have its new floor put in!

Goodbye nasty rust!
Next comes actually putting the plywood over this mess, bolting and gluing it to the floor, and then covering it with linoleum tiles.  I took a ton more measurements, went and grabbed my folding table and skill saw, and got ready to do some cutting.  I got lucky, and managed to rip all three pieces of plywood right (more or less) the first time.  Apparently all those years helping my Dad build houses and what not on The Land paid off after all.  *grin*

That done, I then started at the furthest point from the back entrance (so the part of the van body closest to the cabin in other words) and began putting down a pattern of construction adhesive.  The stuff is pretty nasty, and you seriously don't want to get it on your skin.  I only managed to step in it once during the project, so I consider that more or less a success.  Floor as ready as it was going to be, I stepped out to get my cut piece of plywood.

ACME Brand Instant-Cement (Does not work on Road Runners)

The first piece of flooring went in like a charm, and I set about screwing it into place.  Of course, as luck would have it, I got deck screws that were too long, and they went right through the plywood, right through the floor boards, and then thorugh the bottom of the metal van body!  This was not what I wanted.  Grumbling, I jumped back in the wife's car, rushed back down to the hardware store (knowing full well that no good project is complete without at least  two trips to the store) and bought the right damn screws.  Thus mollified, I returned home once more and screwed that sucker down.  The next went in just as easily and I felt I was making some real progress!  The third had some issues, as I hadn't noticed that the part of the van's interior walls had been slightly crumpled inwards, as if they had been kicked by a donkey/drunk GI/rogue airplane.  The last piece had to be hammered into place, mashing up the very corner bits of the plywood, and taking my "I know what I am doing" feeling down a notch or two.  Still, it was in, and all in all, looked pretty good.  I may not get it right a 100% of the time, but hell, I figured it was good enough for Government work.  ;)

Floors, beeeooootiful flooors!
Time to let the construction adhesive set and do its thang, and call it a very long pair of days.  Next I will struggle with deciding whether or not to put in the linoleum or paint, until I realize I pretty much have to paint if I don't want paint covered linoleum.  Even I can come to the right conclusion eventually, given enough time.  Look forward to posting the next chapter soon.  Hope you all enjoyed the further adventures of The Imperial Car Destroyer!

The truck, the dream, the blog...


Hello everyone!

First off, let me welcome you to the Blog. I am relatively new to blogging, but not to the internet, nor reading blogs. I love to write, and I am excited about sharing my crazy passion for odd vehicles, more specifically my newest acquisition, a 1965 M109A3. In case you are wondering "what the hell is a M109A3?", allow me to elucidate you to the answer.

It is a giant, old army truck. A "light shop van", according to the military, who think "heavy" only counts for artillery and tanks. For some light reading, here is what our friends at Wikipedia have to say about it:


So, how does one go about purchasing something like an M109A3 you might ask yourself? Good question. The answer is, Government Liquidation. I started my dream of extreme off road vehicles some number of years ago, initially in love (still am really) with old Volvo Swedish military communications trucks from the 70s, specifically the Volvo C303. Beautiful van, but when I started trying to picture how I was going to cram my entire family (or my camping crew, The Gentlemen of the Expedition) I couldn't see how we were all going to fit.

It was on my most recent trip to Death Valley that the answer was provided to me. I was out with my Dad, and our friends Ed and Dan at the Racetrack Playa when we came across this amazingly cool old German military communications truck, fully kitted out as an overlander. We had a brief chance to speak with the owners, a totally cool pair of Germans who were travelling around the world in their vehicle. They had already been through Siberia, Europe, and had just shown up in the US recently (at the time). Their truck was beautiful. Here is a picture of their beauty. It was a Mercedes-Benz LA 911B.


So, I hunted around on the web for a while trying to find one once I got to civilization. It ends up, they are extremely hard to find, and most of them are in Europe. On top of that, the parts are going to be extremely scarce, and generally it was going to be a several year long search. Dismayed, I started to hunt around for other options. That's when I stumbled upon this guy:


I read through the whole thing, and decided this was it. I would buy an old U.S. Army truck, just like he did, and use that as the basis for my vehicle. Better yet, this amazing Canadian had already basically documented the steps I would need to do. So, taking his conversion as a template, I forged ahead.

Found the truck on Government Liquidation, currently living on Nellis Airforce Base. I posted my bid, and crossed my fingers. The gods were with me, and I won the bid without going into the poor house too considerably. The next bit was waiting for my Government background check to clear (took about five weeks), which spanned the holidays. My paperwork came back, and much to everyone's surprise, I was not indeed a terrorist. You can imagine my relief.

Next was getting the damn thing off the base. Being that I hadn't every actually seen the thing yet (yeah - I know, that was a little crazy too) and have never driven a vehicle of, shall we say, this caliber, I was a little hesitant to simply take a one way flight there and try to drive the thing back in the middle of winter. So, that being the case, I got a tip from some of the cool peeps at Steel Soldiers to try Hamner Towing, a towing and shipping company in Corona California that has been known to haul around large old military vehicles. After arranging with them, they did the pickup from the base, loaded the truck, and drove it out to Santa Cruz in two days.

A giant semi pulled down my residential street bearing my new vehicle, and a love was born. I still remember the first time I crawled into the cab and started her up, slowly backing her up and then pulling into my not-quite-large-enough driveway. I was terrified and exalted at the same time!

Introductions aside, welcome to the blog, and get ready to read about my progress through getting the thing restored and working. It's going to become the Family RV/Zombie Apocalypse Survival Vehicle, and it's going to be a fun ride, in every sense of the word!